


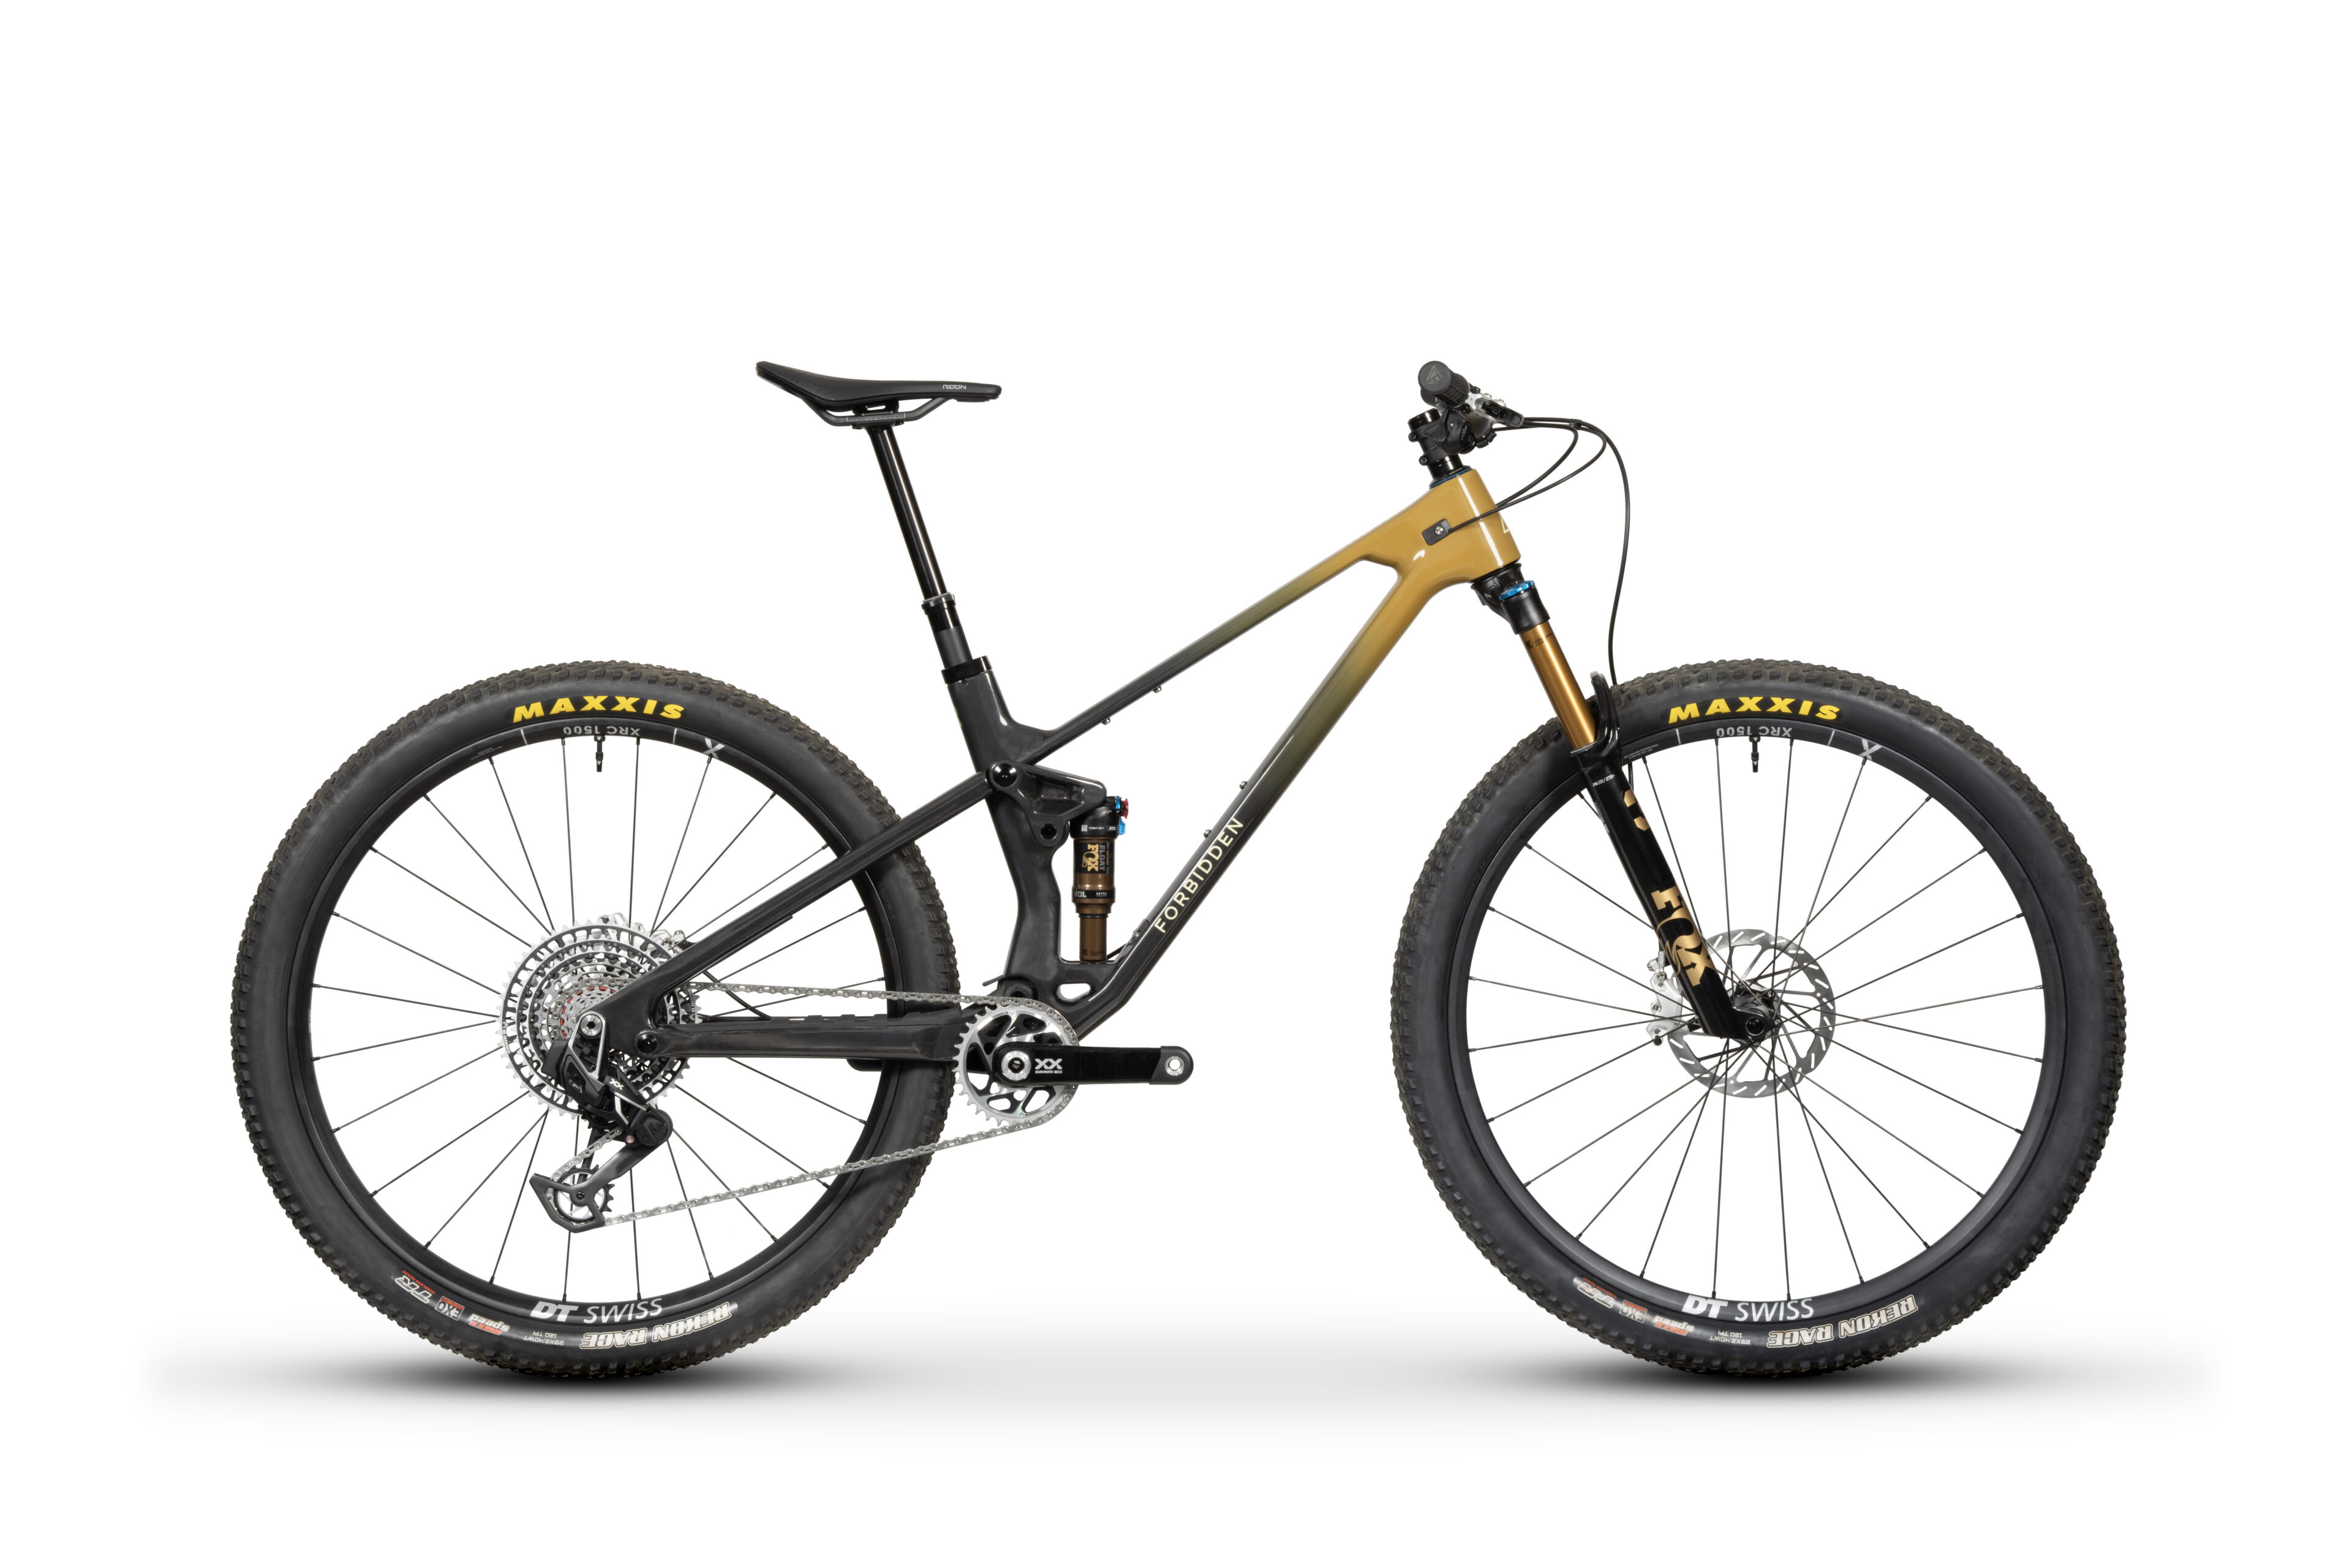
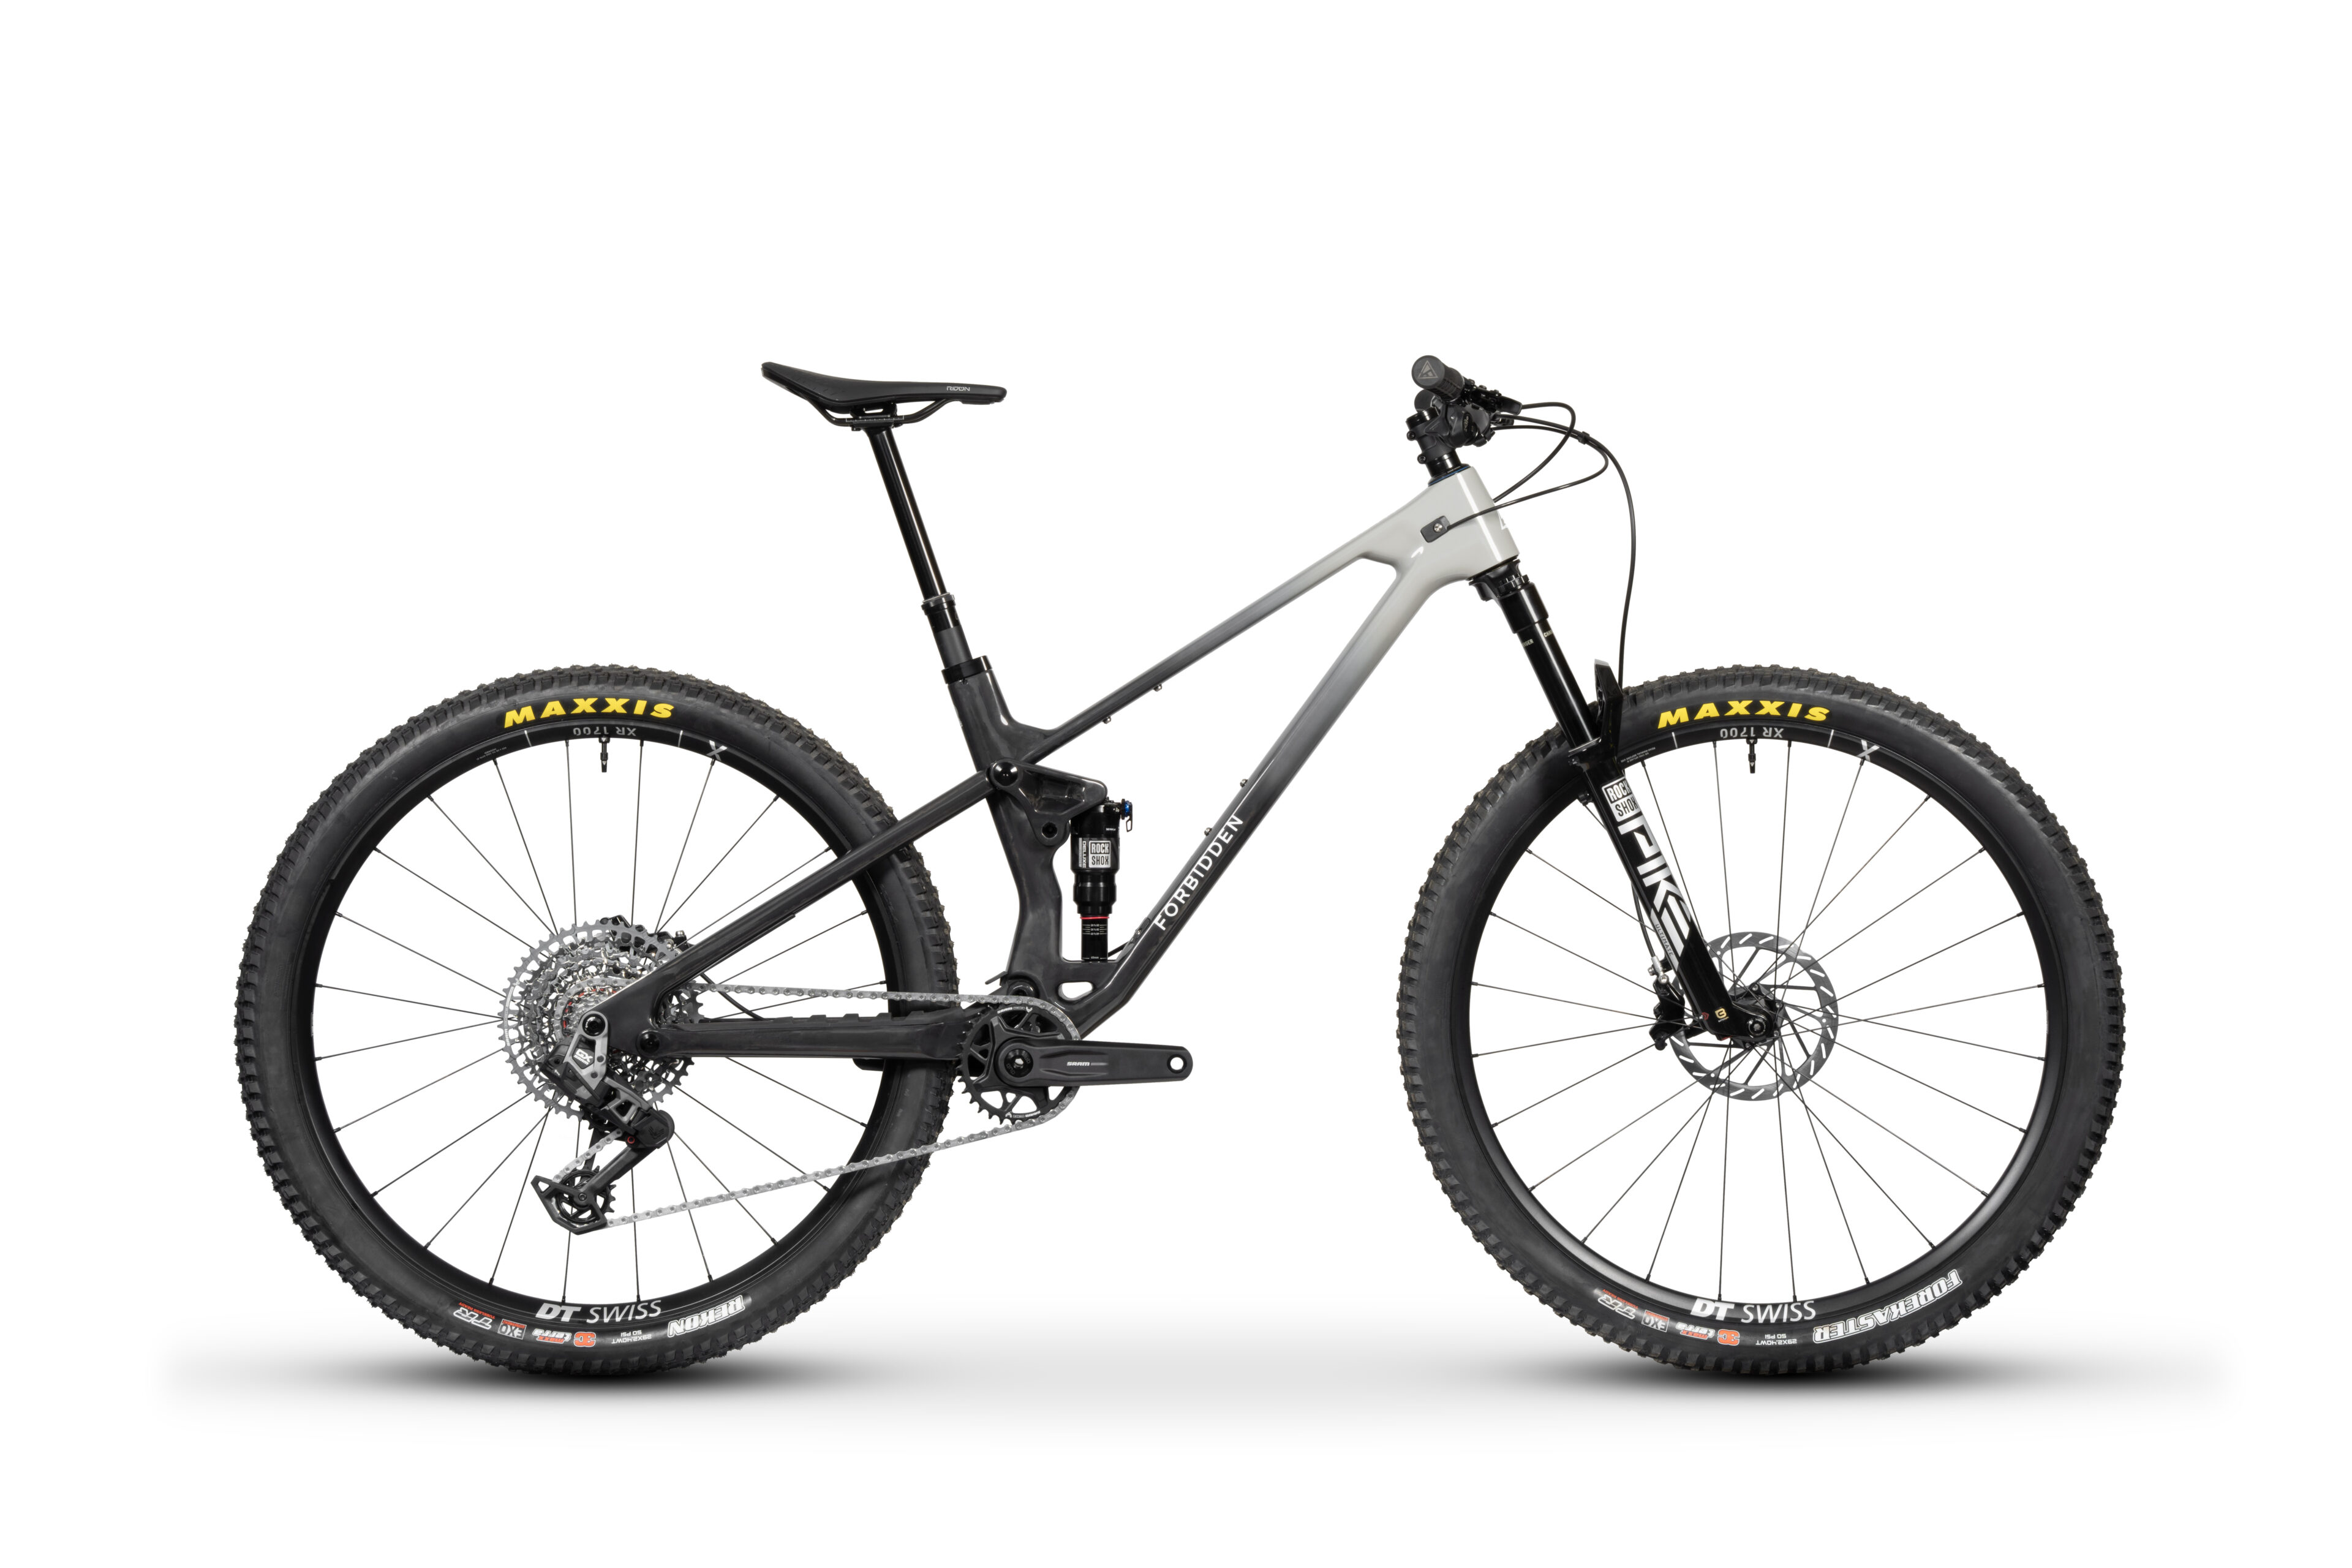
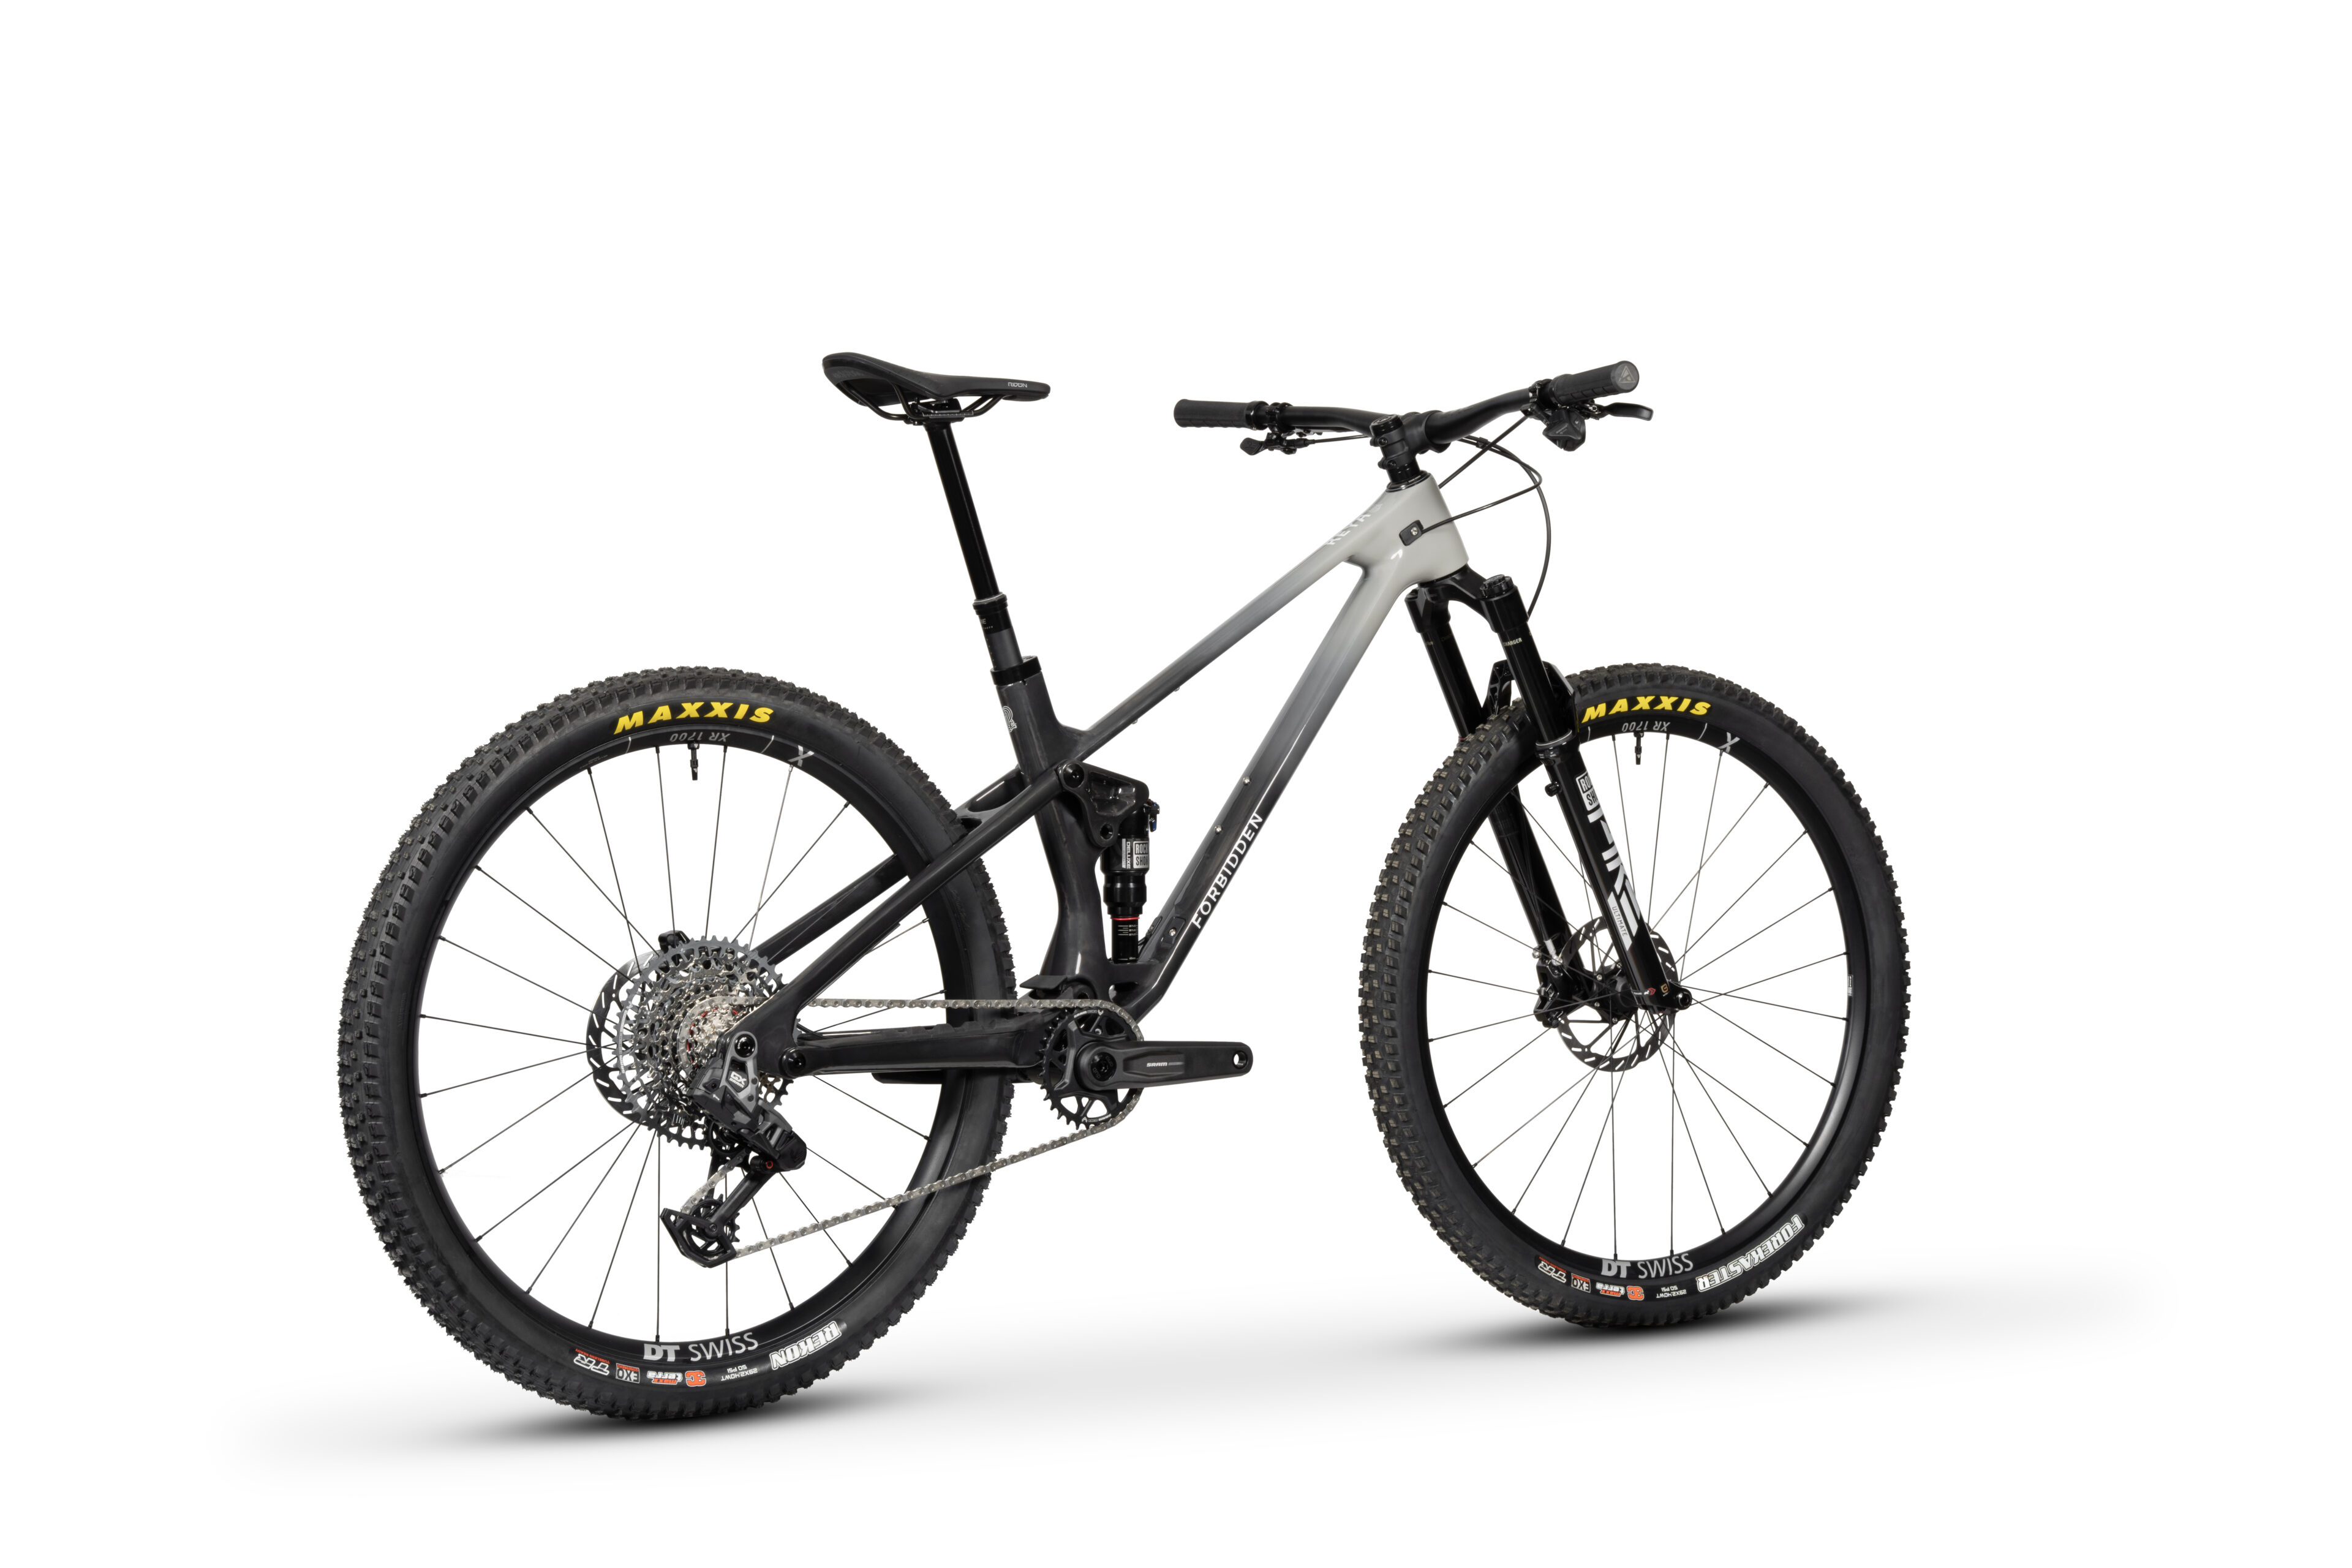
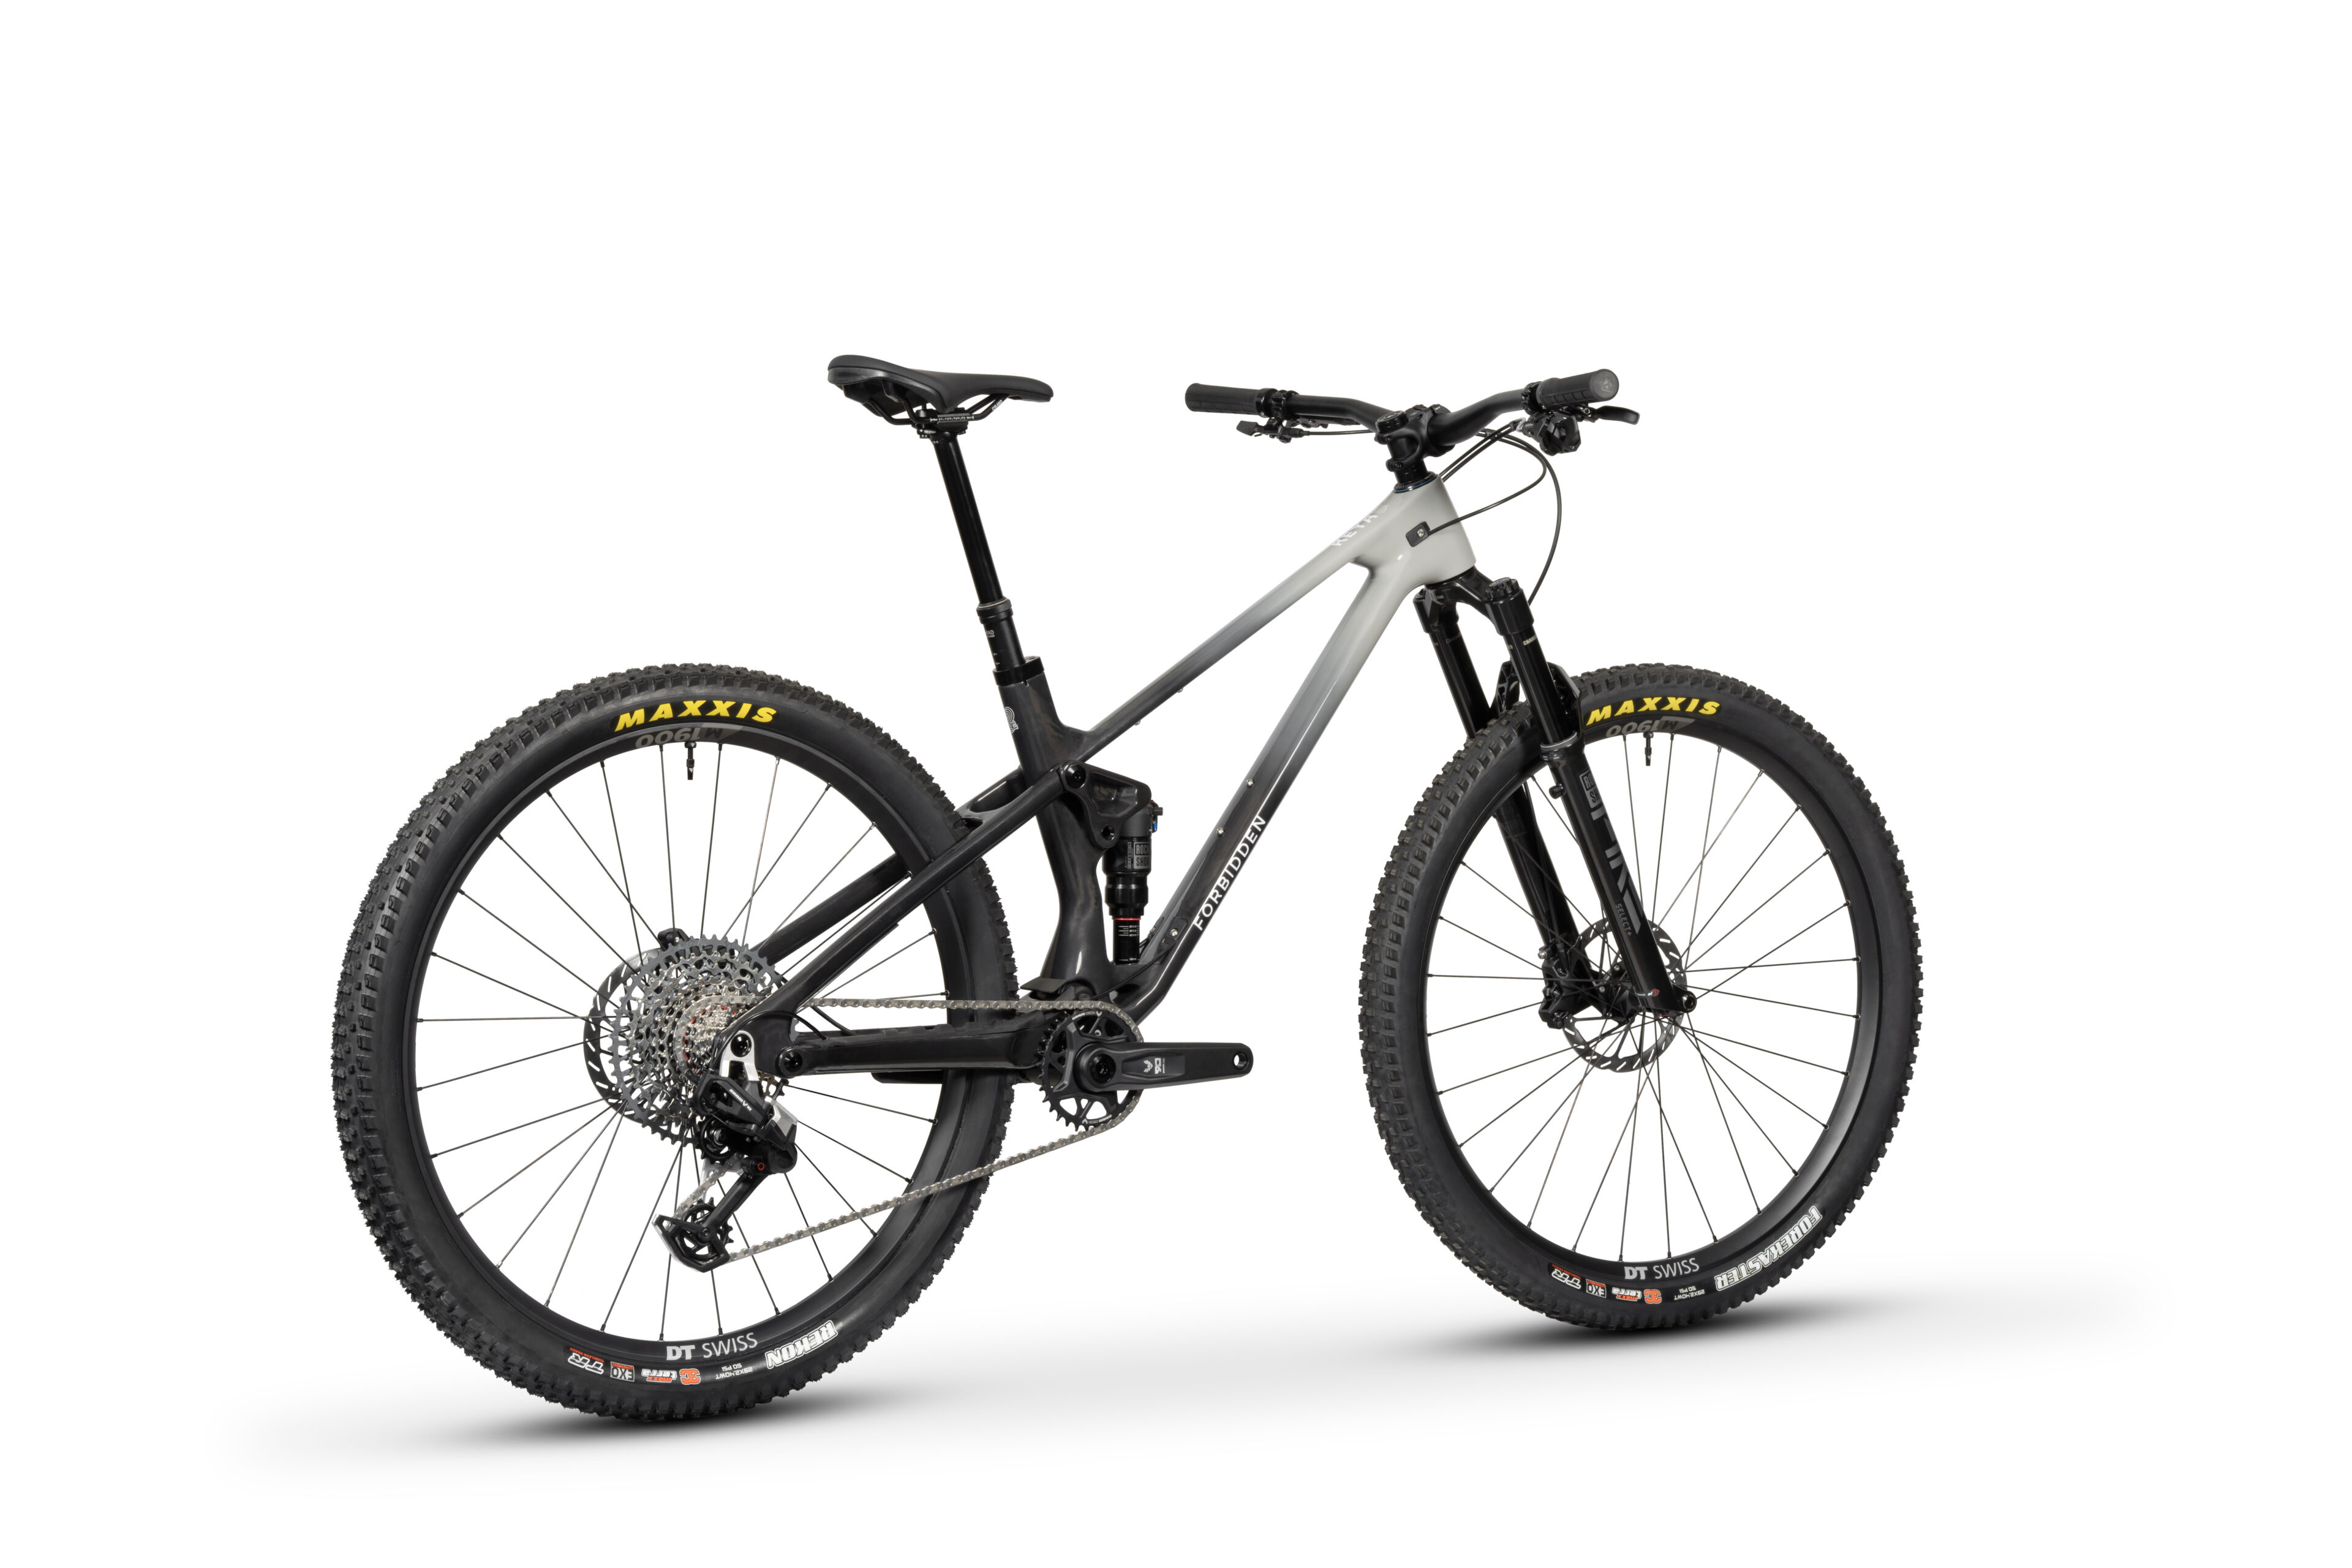
Meet Reya. A short travel trail bike done the Forbidden way. Proportional geo, predictable handling, and a penchant for serving a disproportionate dose of confidence. Up, down, cross country, or back country, this punchy little bike covers ground efficiently while retaining its ability to get rowdy and hang tough when the trail gets rough. This is not an XCO bike with pumped-up travel. It is a bike built from the ground up to maximise fun and speed.
This is suspension and geometry done right.
Reya is a short travel trail bike ready to rip the legs off your lunch lap crew, reclaim your window of spiritual solitude while you sync with the trail, or be the little voice that says yes to those absurd backcountry missions.
The ones that only feel fun weeks after you’re home.
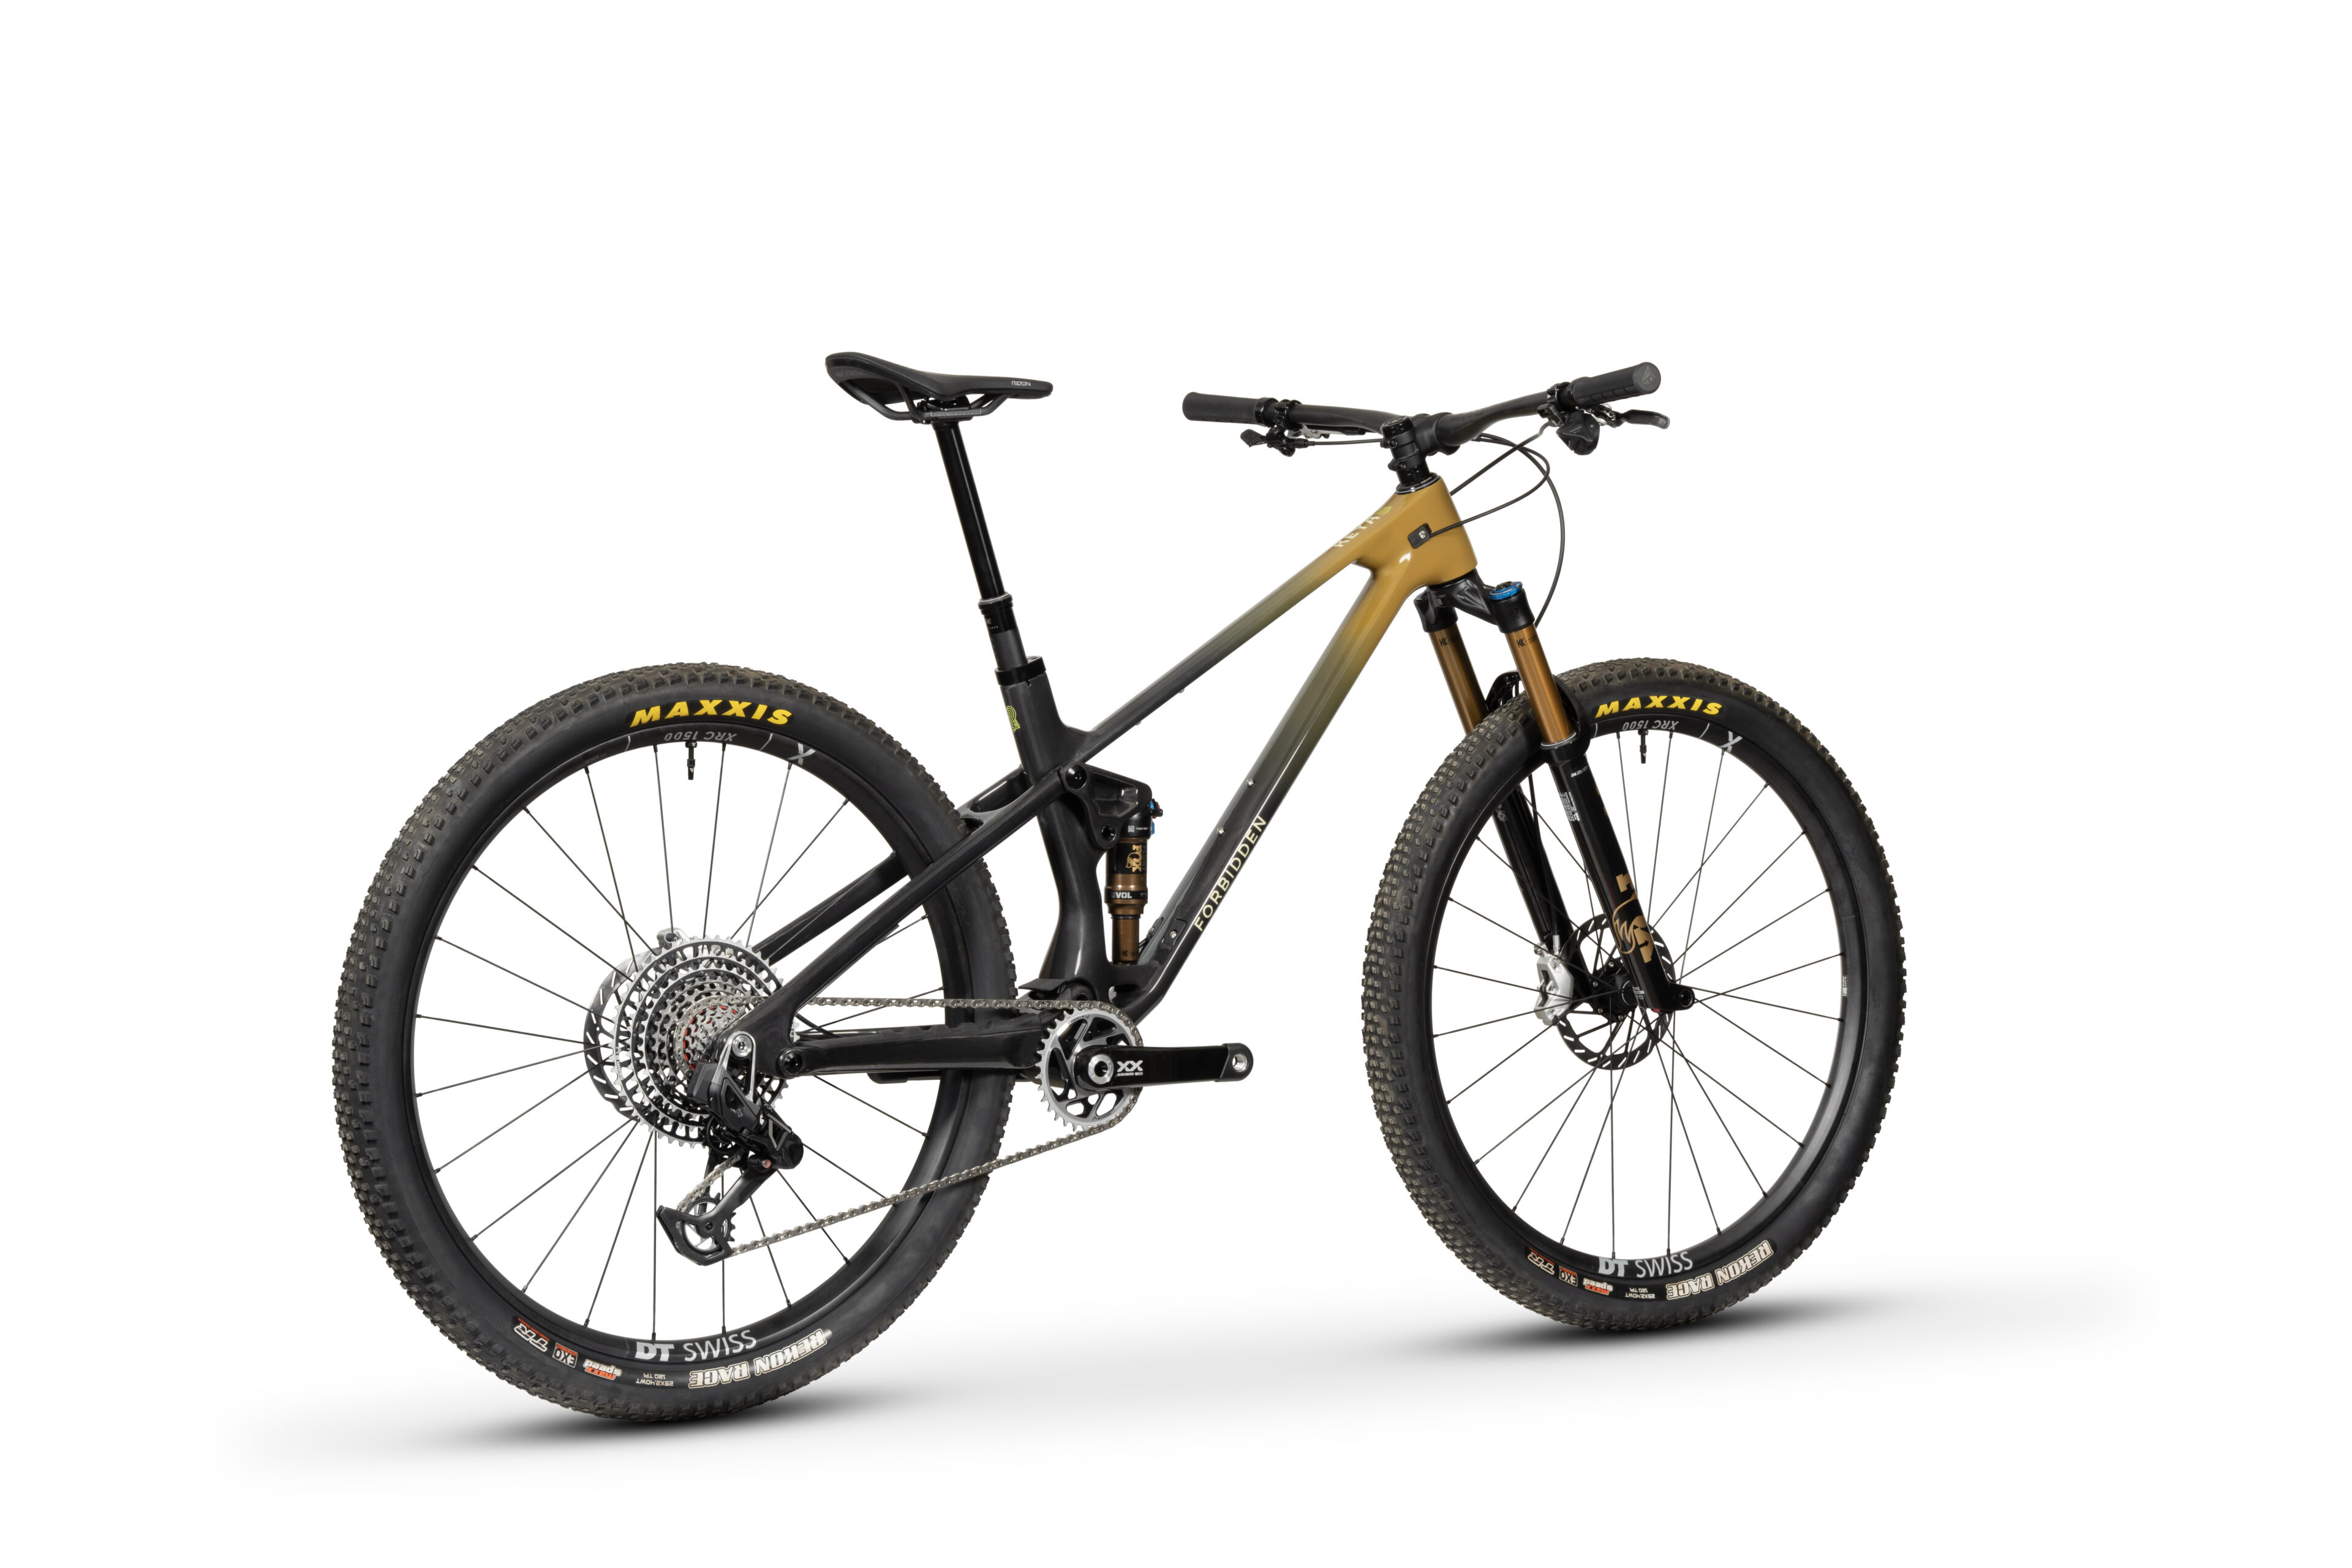
Mountain Biking
120mm Rear / 130mm Front
Full 29er


Reya Tier 1 |
Reya Tier 2 |
Reya Tier 3 |
Coming soon Reya Framekit |
|
|---|---|---|---|---|
|
FRAME |
FRAME Reya Full Carbon - 120mm Travel 120mm | High-Modulus Carbon Fiber | Trifecta V3 4-Bar Suspension | One Ride Geometry | Enduro Max Bearings | 73mm Threaded BSA Bottom Bracket |
FRAME Reya Full Carbon - 120mm Travel 120mm | High-Modulus Carbon Fiber | Trifecta V3 4-Bar Suspension | One Ride Geometry | Enduro Max Bearings | 73mm Threaded BSA Bottom Bracket |
FRAME Reya Full Carbon - 120mm Travel 120mm | High-Modulus Carbon Fiber | Trifecta V3 4-Bar Suspension | One Ride Geometry | Enduro Max Bearings | 73mm Threaded BSA Bottom Bracket |
FRAME Reya Full Carbon - 120mm Travel 120mm | High-Modulus Carbon Fiber | Trifecta V3 4-Bar Suspension | One Ride Geometry | Enduro Max Bearings | 73mm Threaded BSA Bottom Bracket |
|
FORK |
FORK Fox Factory 34SL 130mm Travel | Grip X | Float Evol | Rebound | HSC/LSC Adjust | 44mm Offset | Black |
FORK RockShox Pike Ultimate 130mm Travel | Charger 3.1 RC2 | DebonAir+ W/Butter Cups | Rebound | HSC/LSC Adjust | 44mm Offset | Maxle Stealth Thru-Axle | Gloss Black |
FORK RockShox Pike Select+ 130mm Travel | Charger 3.1 RC2 | DebonAir+ | Rebound | HSC/LSC Adjust | 44mm Offset | Gloss Black |
FORK |
|
REAR SHOCK |
REAR SHOCK Fox Factory Float Float Evol | Rebound | LSC | 2 Position Threshold Lever | Bearing Eyelets | CL/RM/CMM Tune | 190x45mm |
REAR SHOCK RockShox Deluxe Ultimate LinearXL | Rebound | LSC | Threshold Lever | Bearing Adapter Eyelets | R55/C22 Tune | 190x45mm |
REAR SHOCK RockShox Deluxe Select+ LinearXL | Rebound | LSC | Threshold Lever | Bearing Adapter Eyelets | R55/C22 Tune | 190x45mm |
REAR SHOCK RockShox Deluxe Ultimate LinearXL | Rebound | LSC | Threshold Lever | Bearing Adapter Eyelets | R55/C22 Tune | 190x45mm |
|
HEADSET |
HEADSET Cane Creek 40 ZS44/ZS56 | Sealed Cartridge Bearings | 6000 Series Alloy Cups And Materials | Sealed Steel Crown Race |
HEADSET Cane Creek 40 ZS44/ZS56 | Sealed Cartridge Bearings | 6000 Series Alloy Cups And Materials | Sealed Steel Crown Race |
HEADSET Cane Creek 40 ZS44/ZS56 | Sealed Cartridge Bearings | 6000 Series Alloy Cups And Materials | Sealed Steel Crown Race |
HEADSET |
|
GRIPS |
GRIPS Forbidden 128mm length | Single Sided Lock-On | Black |
GRIPS Forbidden 128mm length | Single Sided Lock-On | Black |
GRIPS Forbidden 128mm length | Single Sided Lock-On | Black |
GRIPS |
|
HANDLE BARS |
HANDLE BARS OneUp Carbon 800mm Width | S1-S2:20mm / S3-S4:35mm Rise | 8° Backsweep 5° Upward | 35mm Bar Bore | Carbon |
HANDLE BARS OneUp Alloy 800mm Width | S1-S2:20mm / S3-S4:35mm Rise | 8° Backsweep 5° Upward | 35mm Bar Bore | Carbon |
HANDLE BARS Forbidden Alloy 800mm Width | S1-S2:22.5 / S3-S4:38mm Rise | 9° Backsweep 5° Upward | 35mm Bar Bore | Black |
HANDLE BARS |
|
STEM |
STEM BikeYoke Barkeeper Stem 45mm Black 45mm Length | 35mm Bar Clamp | Black |
STEM BikeYoke Barkeeper Stem 45mm Black 45mm Length | 35mm Bar Clamp | Black |
STEM Forbidden Forged 40mm Length | 35mm Bar Clamp | Black |
STEM |
|
SEAT POST |
SEAT POST OneUp Dropper Post V3 31.6mm | Size Specific Travel S1:150mm / S2:180mm / S3:180mm / S4:210mm |
SEAT POST OneUp Dropper Post V3 31.6mm | Size Specific Travel S1:150mm / S2:180mm / S3:180mm / S4:210mm |
SEAT POST TranzX Reverse 31.6mm | Size Specific Travel S1:140mm / S2:160mm / S3:180mm / S4:210mm |
SEAT POST |
|
SEAT POST REMOTE |
SEAT POST REMOTE OneUp MMX V3 CNC Aluminum | Sealed Bearing | Black Anodized |
SEAT POST REMOTE OneUp MMX V3 CNC Aluminum | Sealed Bearing | Black Anodized |
SEAT POST REMOTE TranzX GLS CNC Aluminum | Sealed Bearing | Black Anodized |
SEAT POST REMOTE |
|
SEAT POST CLAMP |
SEAT POST CLAMP Forbidden 7075 CNC Aluminum | 34.9mm | Black Anodized |
SEAT POST CLAMP Forbidden 7075 CNC Aluminum | 34.9mm | Black Anodized |
SEAT POST CLAMP Forbidden 7075 CNC Aluminum | 34.9mm | Black Anodized |
SEAT POST CLAMP Forbidden 7075 CNC Aluminum | 34.9mm | Black Anodized |
|
SADDLE |
SADDLE Fizik Terra Ridon X1 145mm Width | Carbon Rail | Black |
SADDLE Fizik Terra Ridon X5 145mm Width | Mobius S Alloy Rail | Black |
SADDLE Forbidden 143mm Width | Atmos Shaping | Cro-Mo Rail | Black |
SADDLE |
|
FRONT BRAKE |
FRONT BRAKE SRAM Motive Ultimate Stealth Body | Reach Adjustment | Carbon Lever Blade | Titanium Hardware | Organic Pads |
FRONT BRAKE SRAM Motive Silver Stealth Body | Reach Adjustment | Organic Pads |
FRONT BRAKE SRAM Motive Bronze Stealth Body | Reach Adjustment | Organic Pads |
FRONT BRAKE |
|
FRONT BRAKE ROTOR |
FRONT BRAKE ROTOR SRAM HS2 180 mm | Centrelock | 2.0mm Thinkness | Superior Heat Managment |
FRONT BRAKE ROTOR SRAM HS2 180 mm | Centrelock | 2.0mm Thinkness | Superior Heat Managment |
FRONT BRAKE ROTOR SRAM HS2 180 mm | Centrelock | 2.0mm Thinkness | Superior Heat Managment |
FRONT BRAKE ROTOR |
|
REAR BRAKE |
REAR BRAKE SRAM Motive Ultimate Stealth Body | Reach Adjustment | Carbon Lever Blade | Titanium Hardware | Organic Pads |
REAR BRAKE SRAM Motive Silver Stealth Body | Reach Adjustment | Organic Pads |
REAR BRAKE SRAM Motive Bronze Stealth Body | Reach Adjustment | Organic Pads |
REAR BRAKE |
|
REAR BRAKE ROTOR |
REAR BRAKE ROTOR SRAM HS2 180 mm | Centrelock | 2.0mm Thinkness | Superior Heat Managment |
REAR BRAKE ROTOR SRAM HS2 180 mm | Centrelock | 2.0mm Thinkness | Superior Heat Managment |
REAR BRAKE ROTOR SRAM HS2 180 mm | Centrelock | 2.0mm Thinkness | Superior Heat Managment |
REAR BRAKE ROTOR |
|
REAR SHIFTER |
REAR SHIFTER SRAM Pod Rocker With MMX Clamp | AXS controller | Rocking Actuation |
REAR SHIFTER SRAM Pod Rocker With MMX Clamp | AXS controller | Rocking Actuation |
REAR SHIFTER SRAM Eagle 90 MMX Clamp | 2 Upshift | Two Button Design |
REAR SHIFTER |
|
REAR DERAILLEUR |
REAR DERAILLEUR SRAM XX SL T-Type Hangerless Interface | Overload Clutch | Replaceable Skid Plates |
REAR DERAILLEUR SRAM GX T-Type Hangerless Interface | Replaceable Skid Plates |
REAR DERAILLEUR SRAM Eagle 90 T-Type Hangerless Interface | Replaceable Skid Plates |
REAR DERAILLEUR |
|
CASSETTE |
CASSETTE SRAM XS-1299 12speed | XD Fit | 10-12-14-16-18-21-24-28-32-38-44-52T |
CASSETTE SRAM XS-1275 12speed | XD Fit | 10-12-14-16-18-21-24-28-32-38-44-52T |
CASSETTE SRAM XS-1275 12speed | XD Fit | 10-12-14-16-18-21-24-28-32-38-44-52T |
CASSETTE |
|
CHAIN |
CHAIN SRAM XX SL T-Type 12speed | Links = S1:120 / S2:122 / S3:124 / S4:126 |
CHAIN SRAM GX T-Type 12speed | Links = S1:120 / S2:122 / S3:124 / S4:126 |
CHAIN SRAM GX T-Type 12speed | Links = S1:120 / S2:122 / S3:124 / S4:126 |
CHAIN |
|
CRANKSET |
CRANKSET SRAM XX SL Carbon | 165mm | SRAM 32T Alloy Chainring | 55mm Chainline |
CRANKSET SRAM S1000 165mm | SRAM 32T Alloy Chainring | 55mm Chainline |
CRANKSET SRAM Eagle 90 165mm | SRAM 32T Alloy Chainring | 55mm Chainline |
CRANKSET |
|
PEDALS |
PEDALS N/A |
PEDALS N/A |
PEDALS N/A |
PEDALS N/A |
|
UPPER CHAIN GUIDE |
UPPER CHAIN GUIDE N/A |
UPPER CHAIN GUIDE N/A |
UPPER CHAIN GUIDE N/A |
UPPER CHAIN GUIDE N/A |
|
LOWER CHAIN GUIDE |
LOWER CHAIN GUIDE N/A |
LOWER CHAIN GUIDE N/A |
LOWER CHAIN GUIDE N/A |
LOWER CHAIN GUIDE N/A |
|
BOTTOM BRACKET |
BOTTOM BRACKET SRAM DUB Threaded BSA Wide 28.99mm Spindle | DUB | Threaded BSA |
BOTTOM BRACKET SRAM DUB Threaded BSA Wide 28.99mm Spindle | DUB | Threaded BSA |
BOTTOM BRACKET SRAM DUB Threaded BSA Wide 28.99mm Spindle | DUB | Threaded BSA |
BOTTOM BRACKET |
|
FRONT HUB |
FRONT HUB DT Swiss 240 SPLINE 110x15mm | 28-Hole | Centrelock | Black Anodized |
FRONT HUB DT Swiss 350 SPLINE 110x15mm | 28-Hole | Centrelock | Black Anodized |
FRONT HUB DT Swiss 370 SPLINE 110x15mm | 28-Hole | Centrelock | Black Anodized |
FRONT HUB |
|
FRONT AXLE |
FRONT AXLE Kabolt SL 6mm Hex Fitment |
FRONT AXLE Maxle Stealth 6mm Hex Fitment |
FRONT AXLE Maxle Stealth 6mm Hex Fitment |
FRONT AXLE |
|
REAR HUB |
REAR HUB DT Swiss 240 SPLINE Ratchet EXP 54 Ratchet | XD Driver | 148x12mm | 28-hole | Centrelock | Black Anodized |
REAR HUB DT Swiss 350 SPLINE Ratchet EXP 54T Ratchet | XD Driver | 148x12mm | 28-hole | Centrelock | Black Anodized |
REAR HUB DT Swiss 370 SPLINE Ratchet LN 18T LN Ratchet | XD Driver | 148x12mm | 28-hole | Centrelock | Black Anodized |
REAR HUB |
|
REAR AXLE |
REAR AXLE SRAM Maxle Stealth 180x12mm | 5mm Hex Fitment |
REAR AXLE SRAM Maxle Stealth 180x12mm | 5mm Hex Fitment |
REAR AXLE SRAM Maxle Stealth 180x12mm | 5mm Hex Fitment |
REAR AXLE SRAM Maxle Stealth 180x12mm | 5mm Hex Fitment |
|
SPOKES |
SPOKES DT CompLite 2.0-1.5-2.3mm | Pro Lock Nipples |
SPOKES DT Swiss CompRace 2.0-1.8-2.0mm | Pro Lock Nipples |
SPOKES DT Swiss Champion 2.0-1.8-2.0mm | Pro Lock Nipples |
SPOKES |
|
RIMS |
RIMS DT Swiss 1500 Carbon | Asymmetric | 30mm Internal Width | 24-Hole | Tubeless Ready |
RIMS DT Swiss 1700 Aluminum Welded | Asymmetric | 28mm Internal Width | 24-Hole | Tubeless Ready | Hooked |
RIMS DT Swiss 1900 Aluminum | 30mm Internal Width | 28-Hole | Tubeless Ready | Hooked |
RIMS |
|
FRONT TIRE |
FRONT TIRE Maxxis Rekon Race 29 x 2.4 | 3C MaxxTerra Rubber Compound | 60tpi | Folding | Tubeless Ready | EXO Casing |
FRONT TIRE Maxxis Forekaster 29 x 2.4 | 3C MaxxTerra Rubber Compound | 60tpi | Folding | Tubeless Ready | EXO Casing |
FRONT TIRE Maxxis Forekaster 29 x 2.4 | 3C MaxxTerra Rubber Compound | 60tpi | Folding | Tubeless Ready | EXO Casing |
FRONT TIRE |
|
REAR TIRE |
REAR TIRE Maxxis Rekon Race 29 x 2.4 | 3C MaxxTerra Rubber Compound | 60tpi | Folding | Tubeless Ready | EXO Casing |
REAR TIRE Maxxis Rekon 29 x 2.4 | 3C MaxxTerra Rubber Compound | 60tpi | Folding | Tubeless Ready | EXO Casing |
REAR TIRE Maxxis Rekon 29 x 2.4 | 3C MaxxTerra Rubber Compound | 60tpi | Folding | Tubeless Ready | EXO Casing |
REAR TIRE |
|
Included |
Included Stans Sealant 200ml |
Included Stans Sealant 200ml |
Included Stans Sealant 200ml |
Included SRAM UDH Hanger |
|
Included |
Included SRAM AXS EP Powerpack 1 Battery | USB Charger |
Included SRAM AXS EP Powerpack 1 Battery | USB Charger |
Included SRAM AXS EP Powerpack 1 Battery | USB Charger |
Included |
*Please note: we make every effort to ensure accuracy of the Spec Information, but they are subject to change.
*Please note: we make every effort to ensure accuracy of the Spec Information, but they are subject to change.
5'2
158cm
5'6
168cm
5'6
168cm
5'10
178cm
5'10
178cm
6'2
188cm
6'2
188cm
6'6
198cm
| Fork Size 130mm | S1 | S2 | S3 | S4 | |
|---|---|---|---|---|---|
| A | Reach | 435 | 455 | 475 | 495 |
| B | Stack | 598 | 612 | 625 | 639 |
| C | Hori. Top Tube Length | 573 | 596 | 619 | 642 |
| D | Seat Tube Length | 400 | 420 | 440 | 470 |
| E | Seat Tube Angle (Effective) | 77 | 77 | 77 | 77 |
| F | Seat Tube Angle (Actual) | 68.9 | 71.3 | 73.4 | 75.2 |
| G | Head Tube Length | 90 | 105 | 120 | 135 |
| H | Head Tube Angle | 65.0 | 65.0 | 65.0 | 65.0 |
| I | Front Center | 743 | 769 | 796 | 822 |
| J | Rear Center | 420 | 435 | 449 | 464 |
| K | Wheel base | 1163 | 1204 | 1244 | 1285 |
| L | BB Drop | -42 | -42 | -42 | -44 |
| M | BB Height | 331 | 331 | 331 | 331 |
| N | Stand Over | 715 | 717 | 719 | 721 |
| O | Fork Length | 541 | 541 | 541 | 541 |
| P | Fork Offset | 44 | 44 | 44 | 44 |
544mm
44mm
190mm x 45mm (30mm x 8mm hardware)
ZS44/28.6 ZS56/40
148mm
73mm BSA Threaded
52mm or 55mm
S1: 34T S2: 36T S3: 38T S4: 38T
Tabs for Chain Guide Only
S1: 245mm S2: 265mm S3:300mm S4: 320mm
31.6mm
180mm Post Mount
29 x 2.4
29 x 2.6
2.27Kg

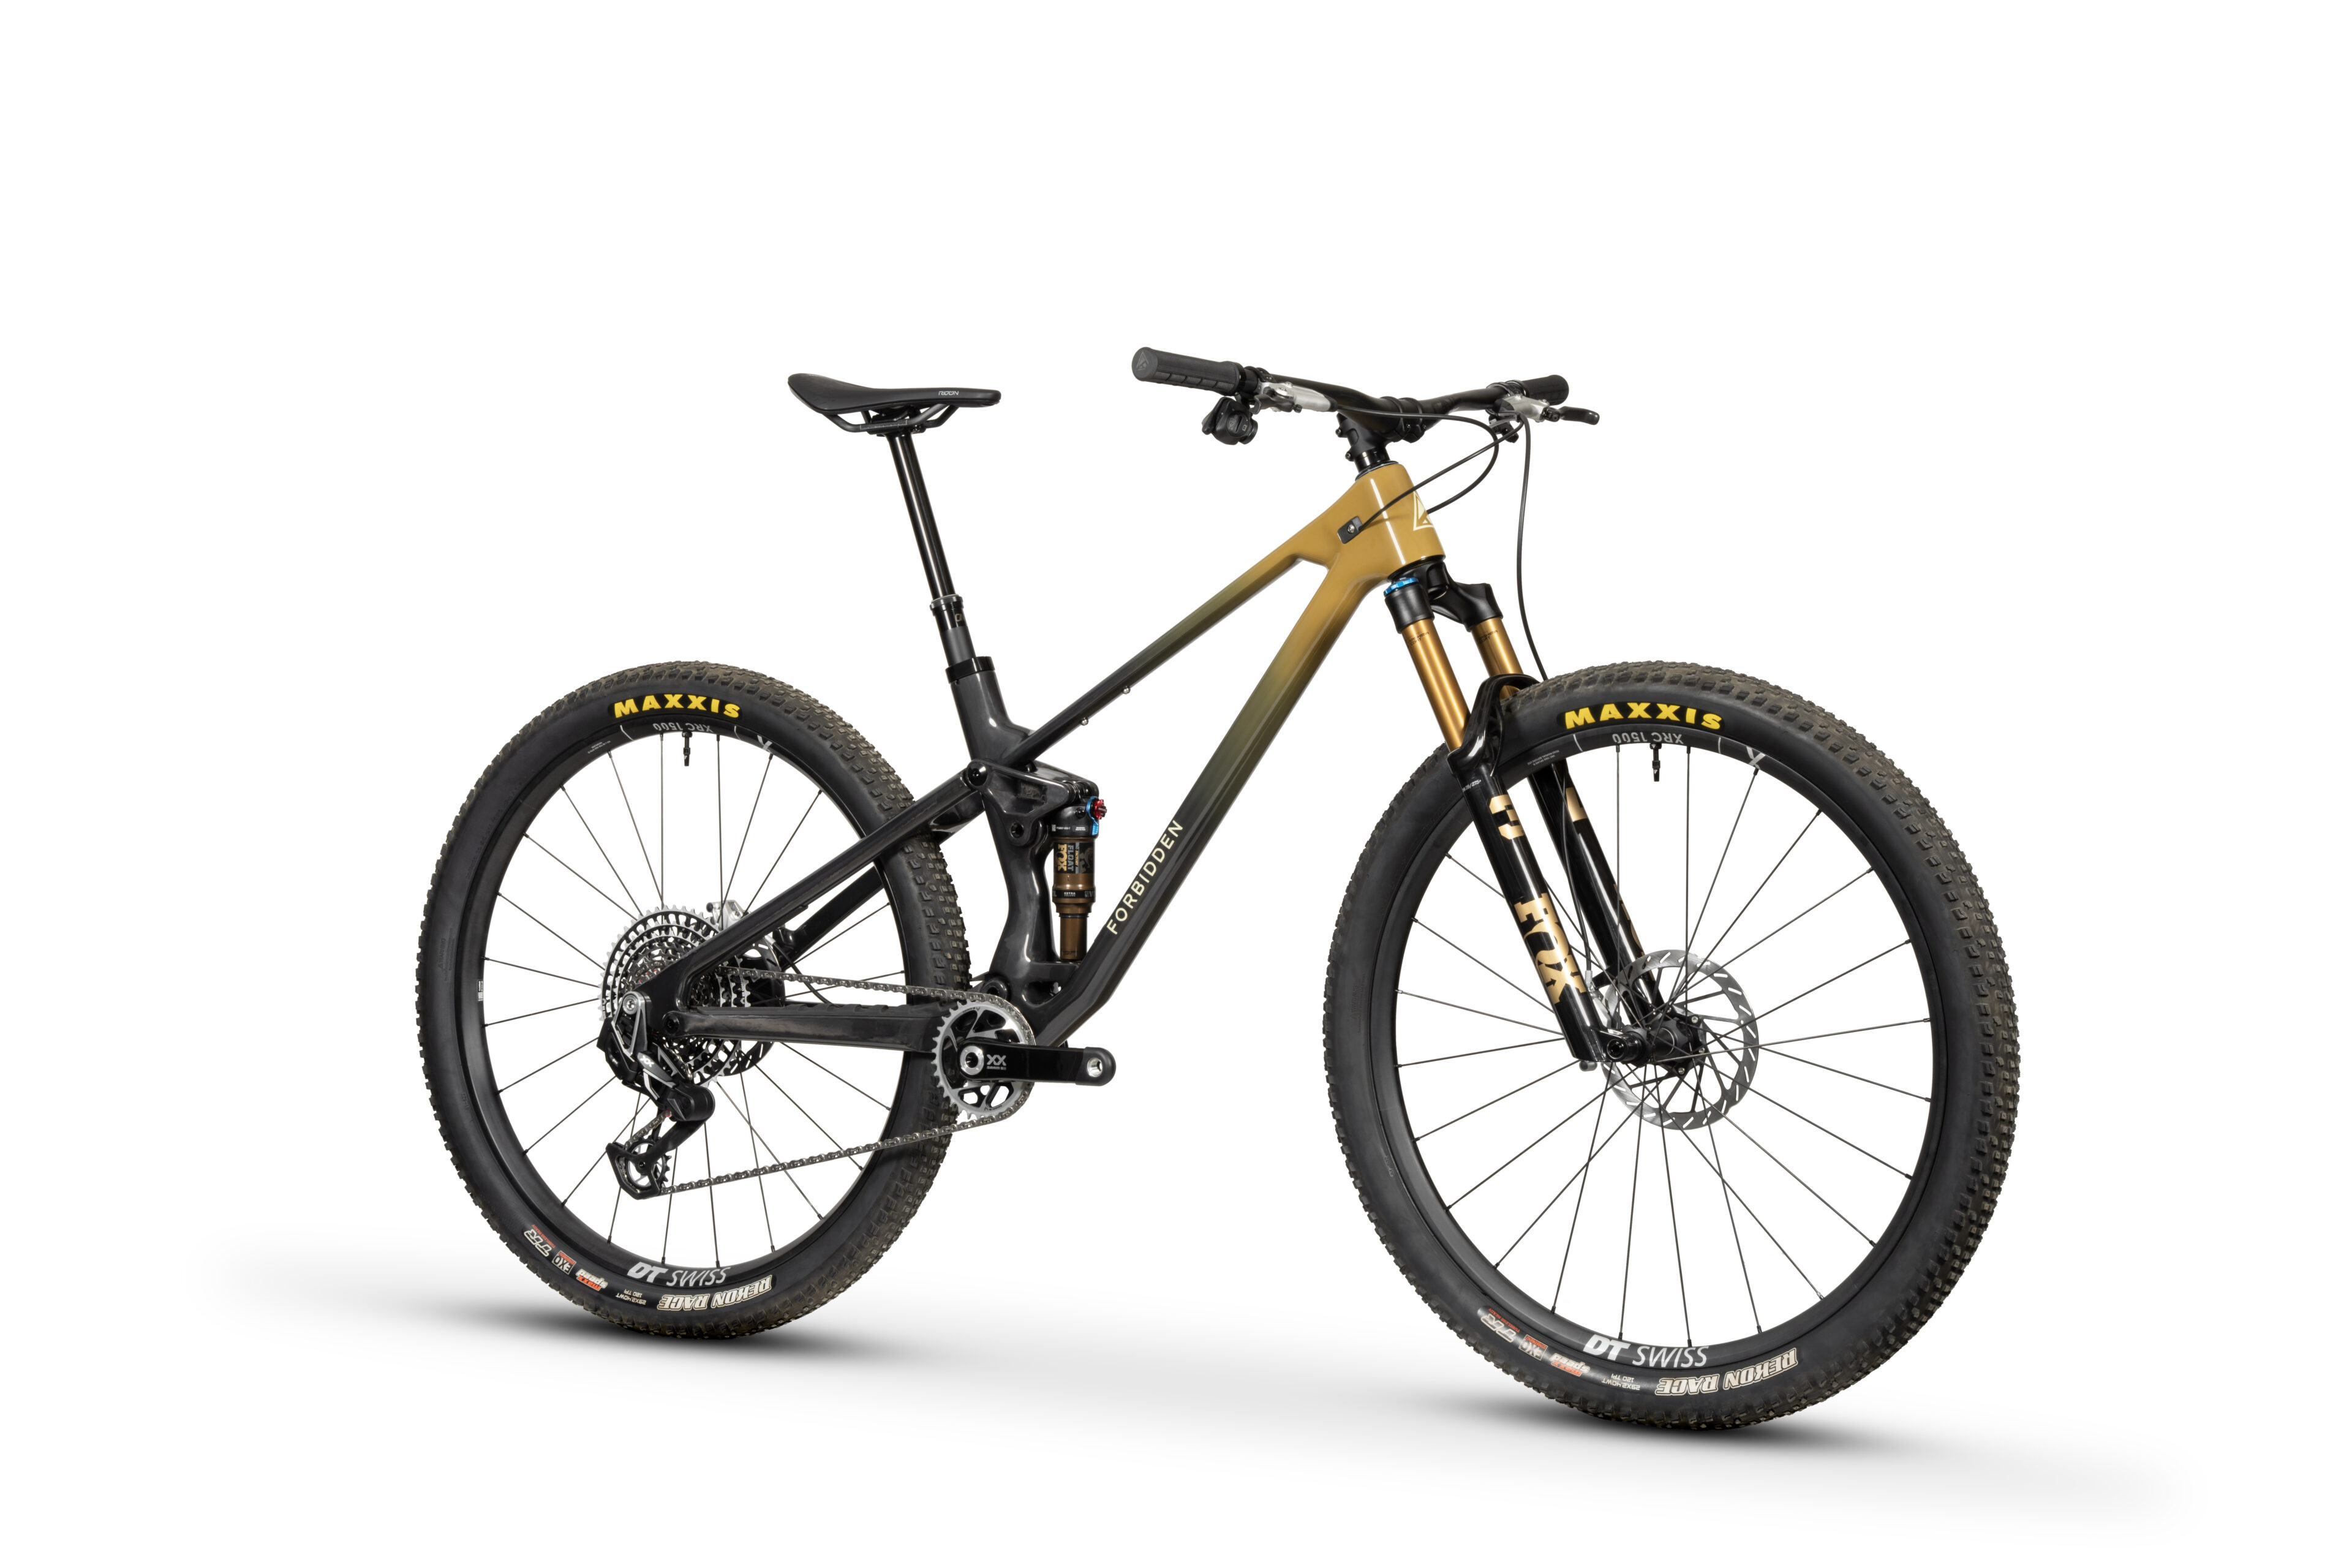
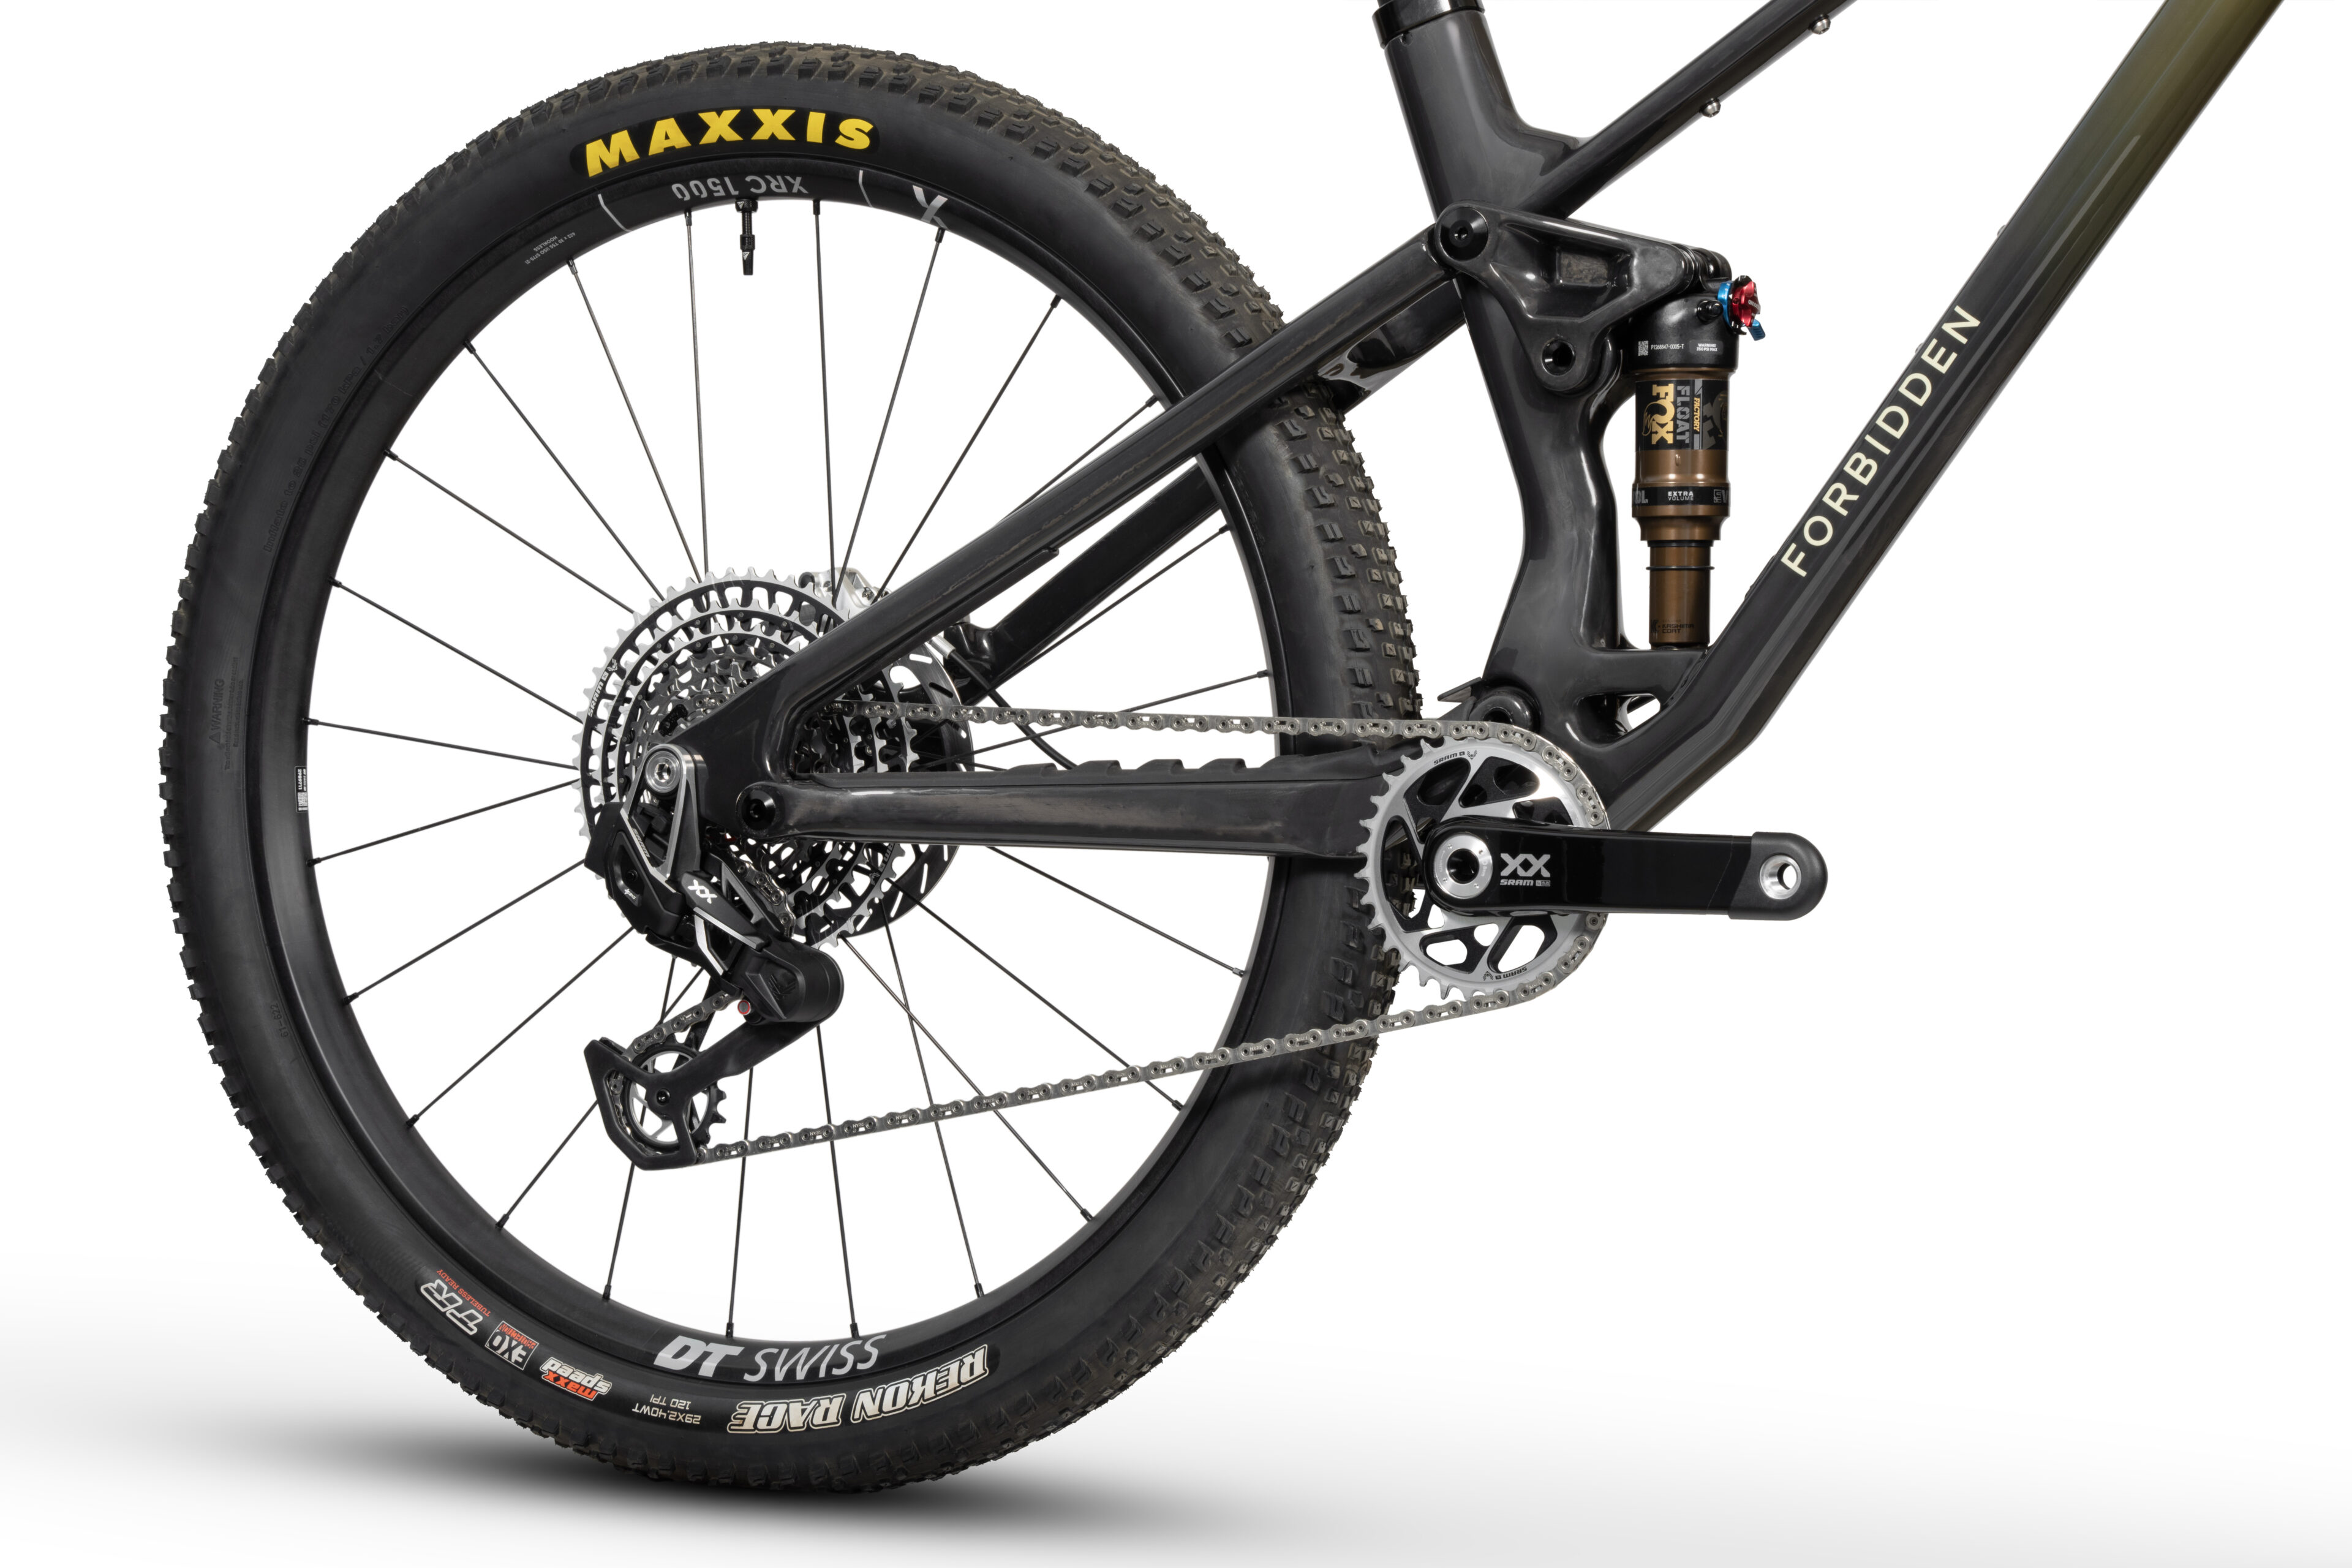
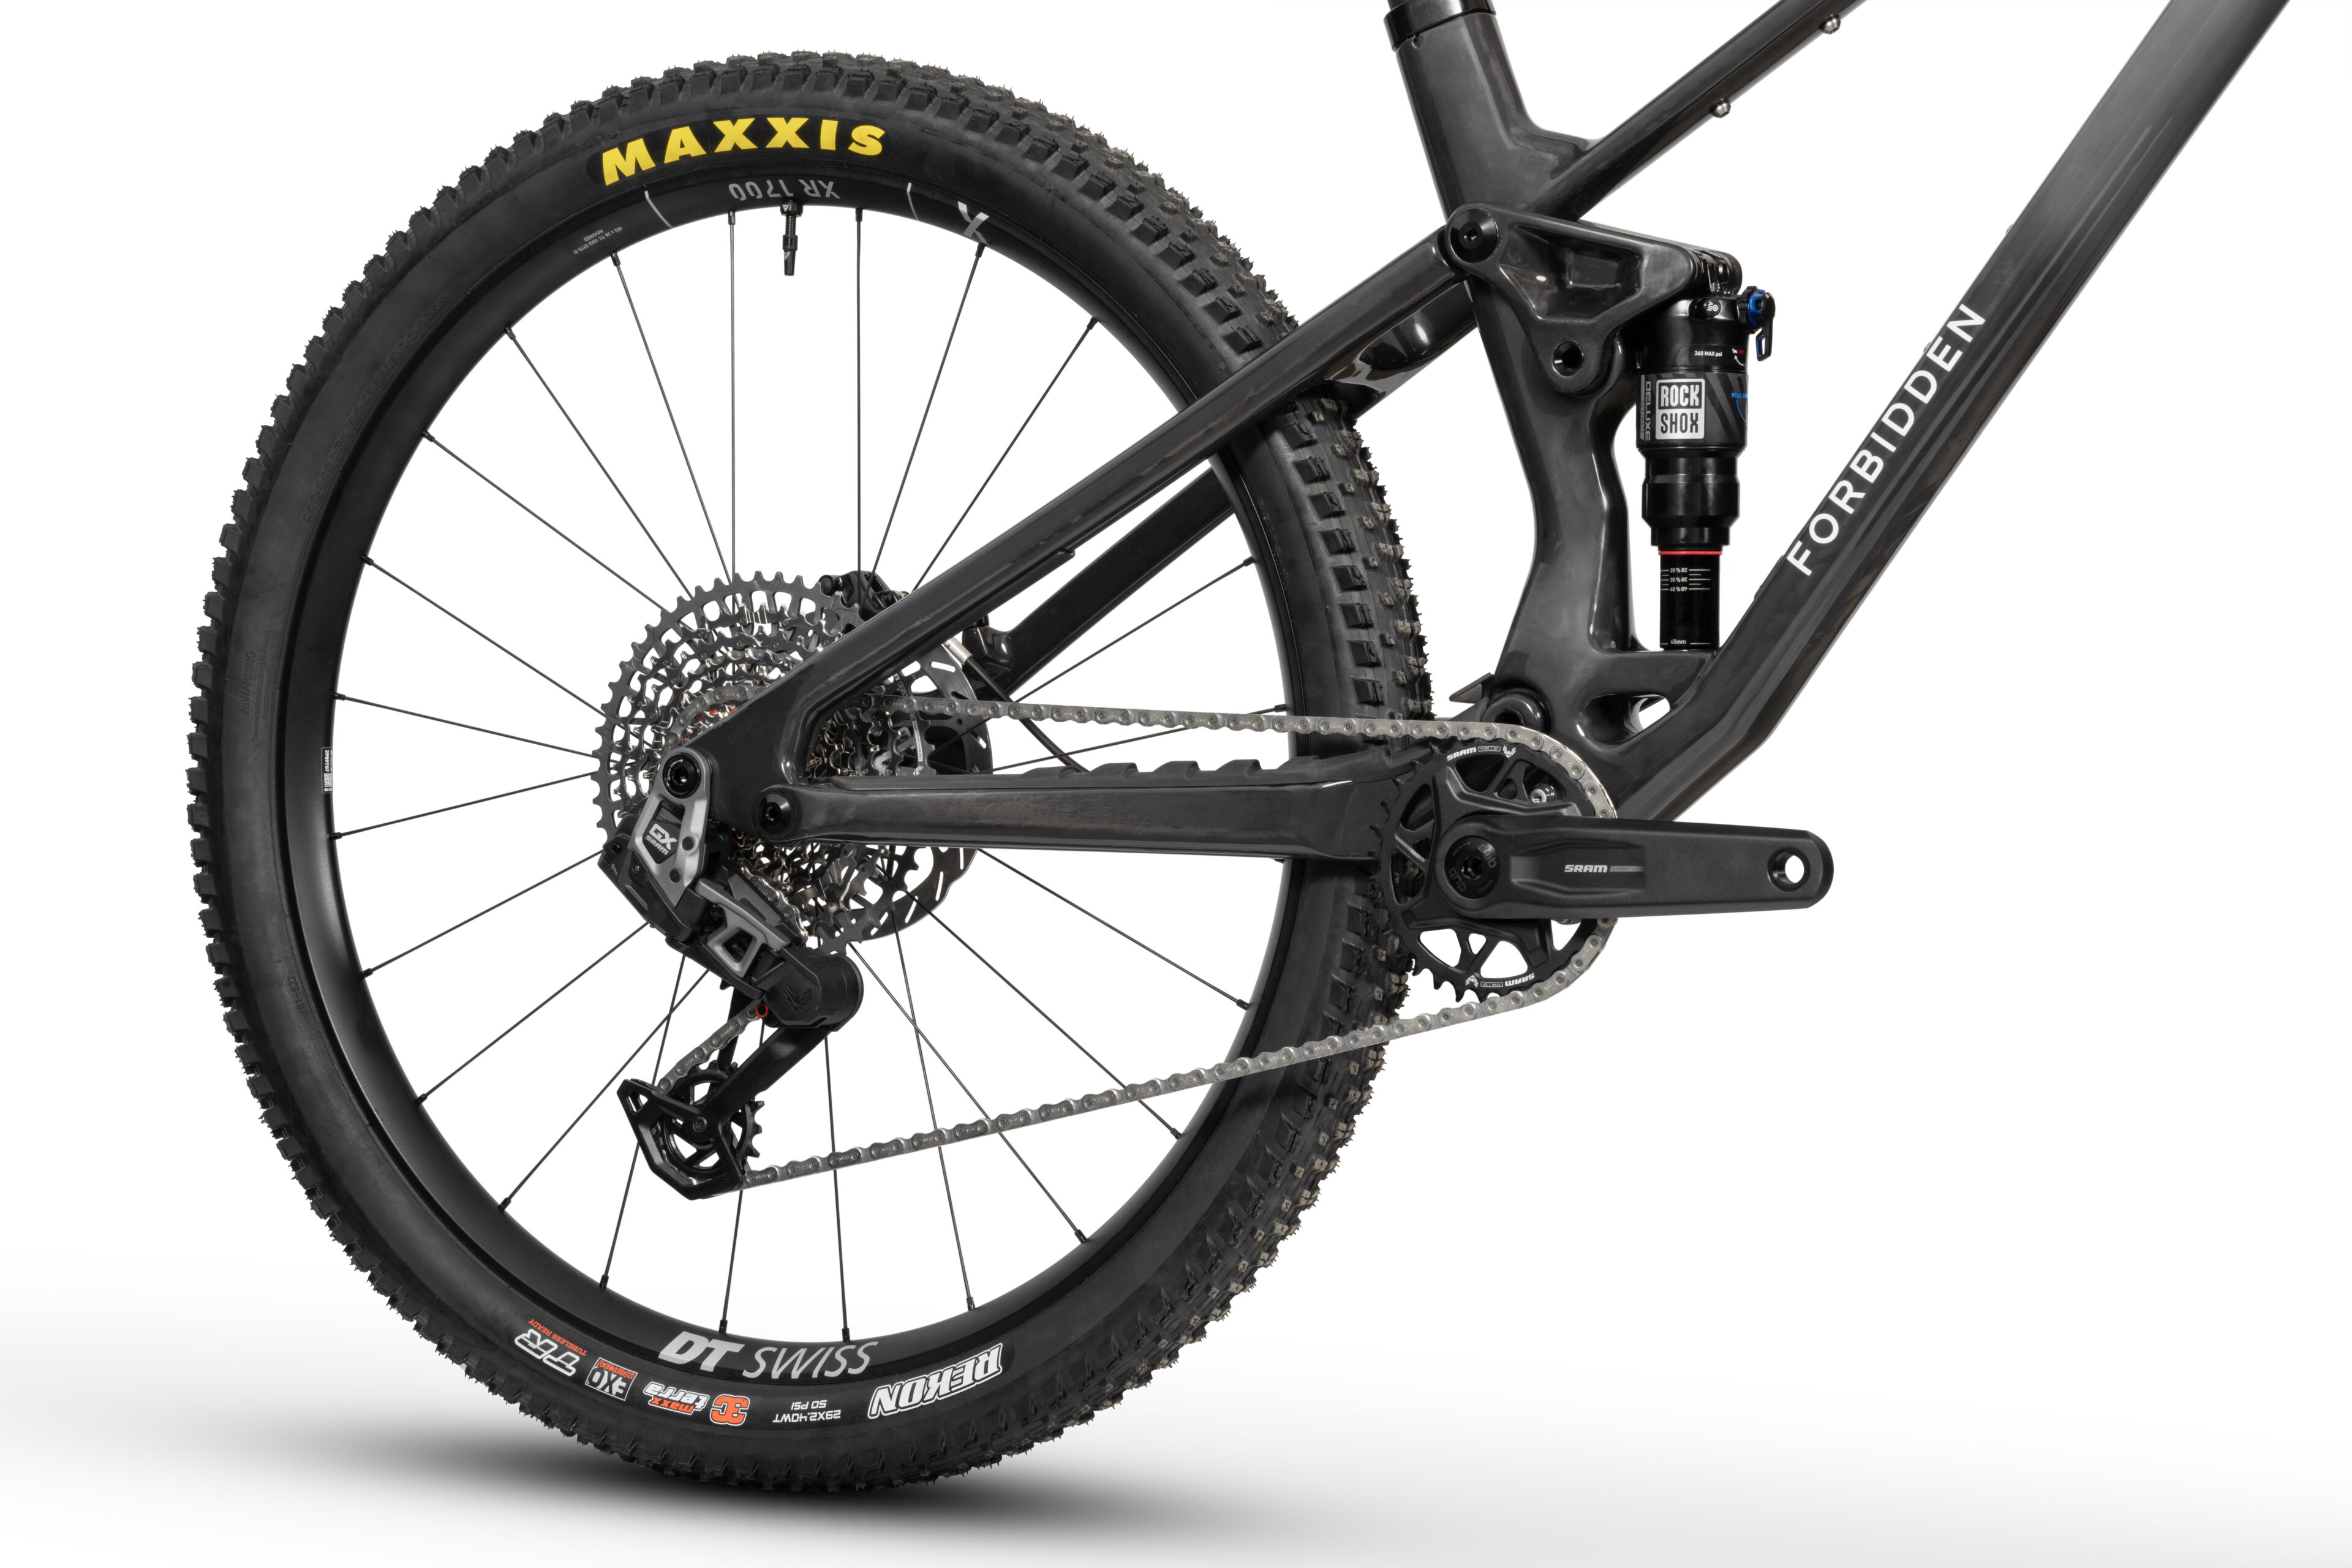
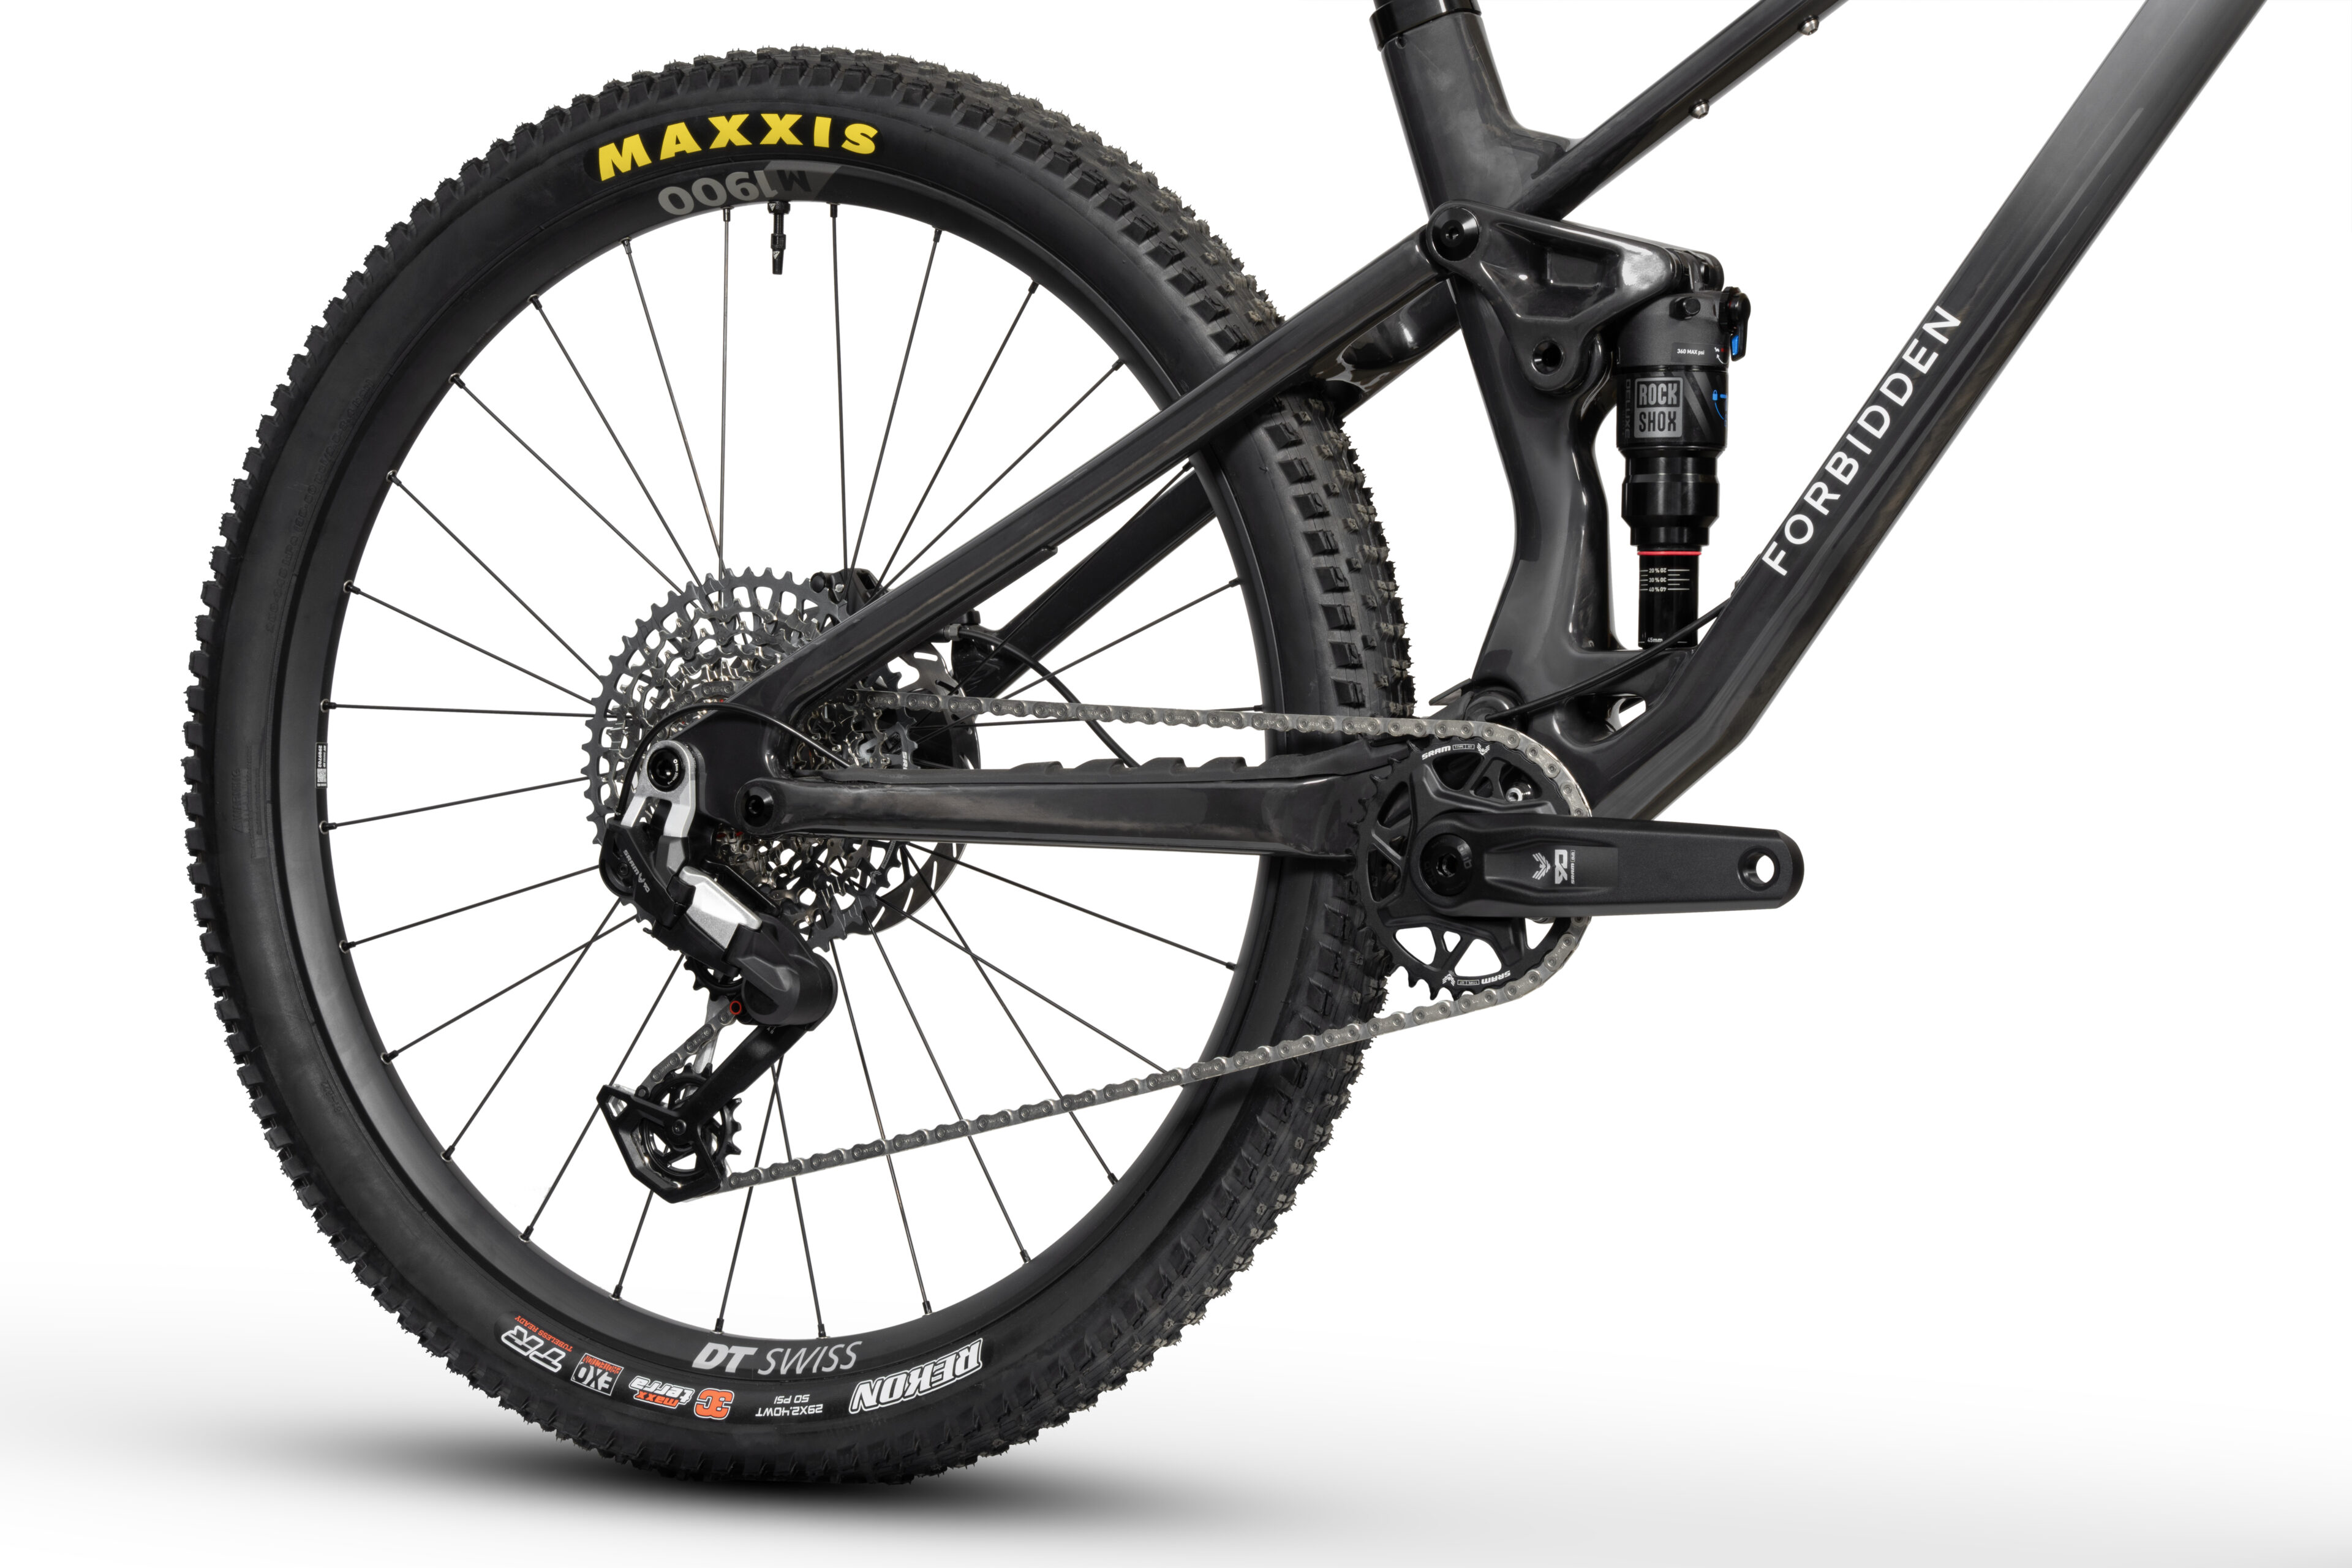
The latest iteration of our Trifecta platform elevates the spellbinding ride characteristics you expect from a Forbidden to a new level. For Reya, we put less priority on the axle path and more on getting the right suspension characteristic for the intended trail and use case for this category. The goal was to to maximize traction, momentum, and efficiency. No idler. No high pivot. All Forbidden
The latest iteration of our Trifecta platform elevates the spellbinding ride characteristics you expect from a Forbidden to a new level. For Reya, we put less priority on the axle path and more on getting the right suspension characteristic for the intended trail and use case for this category. The goal was to to maximize traction, momentum, and efficiency. No idler. No high pivot. All Forbidden

The Trifecta V3 platform features a carbon rocker link. The carbon rocker link is light, stiff, reduces unsprung mass, isolates the shock from lateral forces, and gives the bike the right amount of progressivity for its intended use. 8 x 30 mm bearing hardware, top and bottom, comes as standard on all shocks.
The Trifecta V3 platform features a carbon rocker link. The carbon rocker link is light, stiff, reduces unsprung mass, isolates the shock from lateral forces, and gives the bike the right amount of progressivity for its intended use. 8 x 30 mm bearing hardware, top and bottom, comes as standard on all shocks.

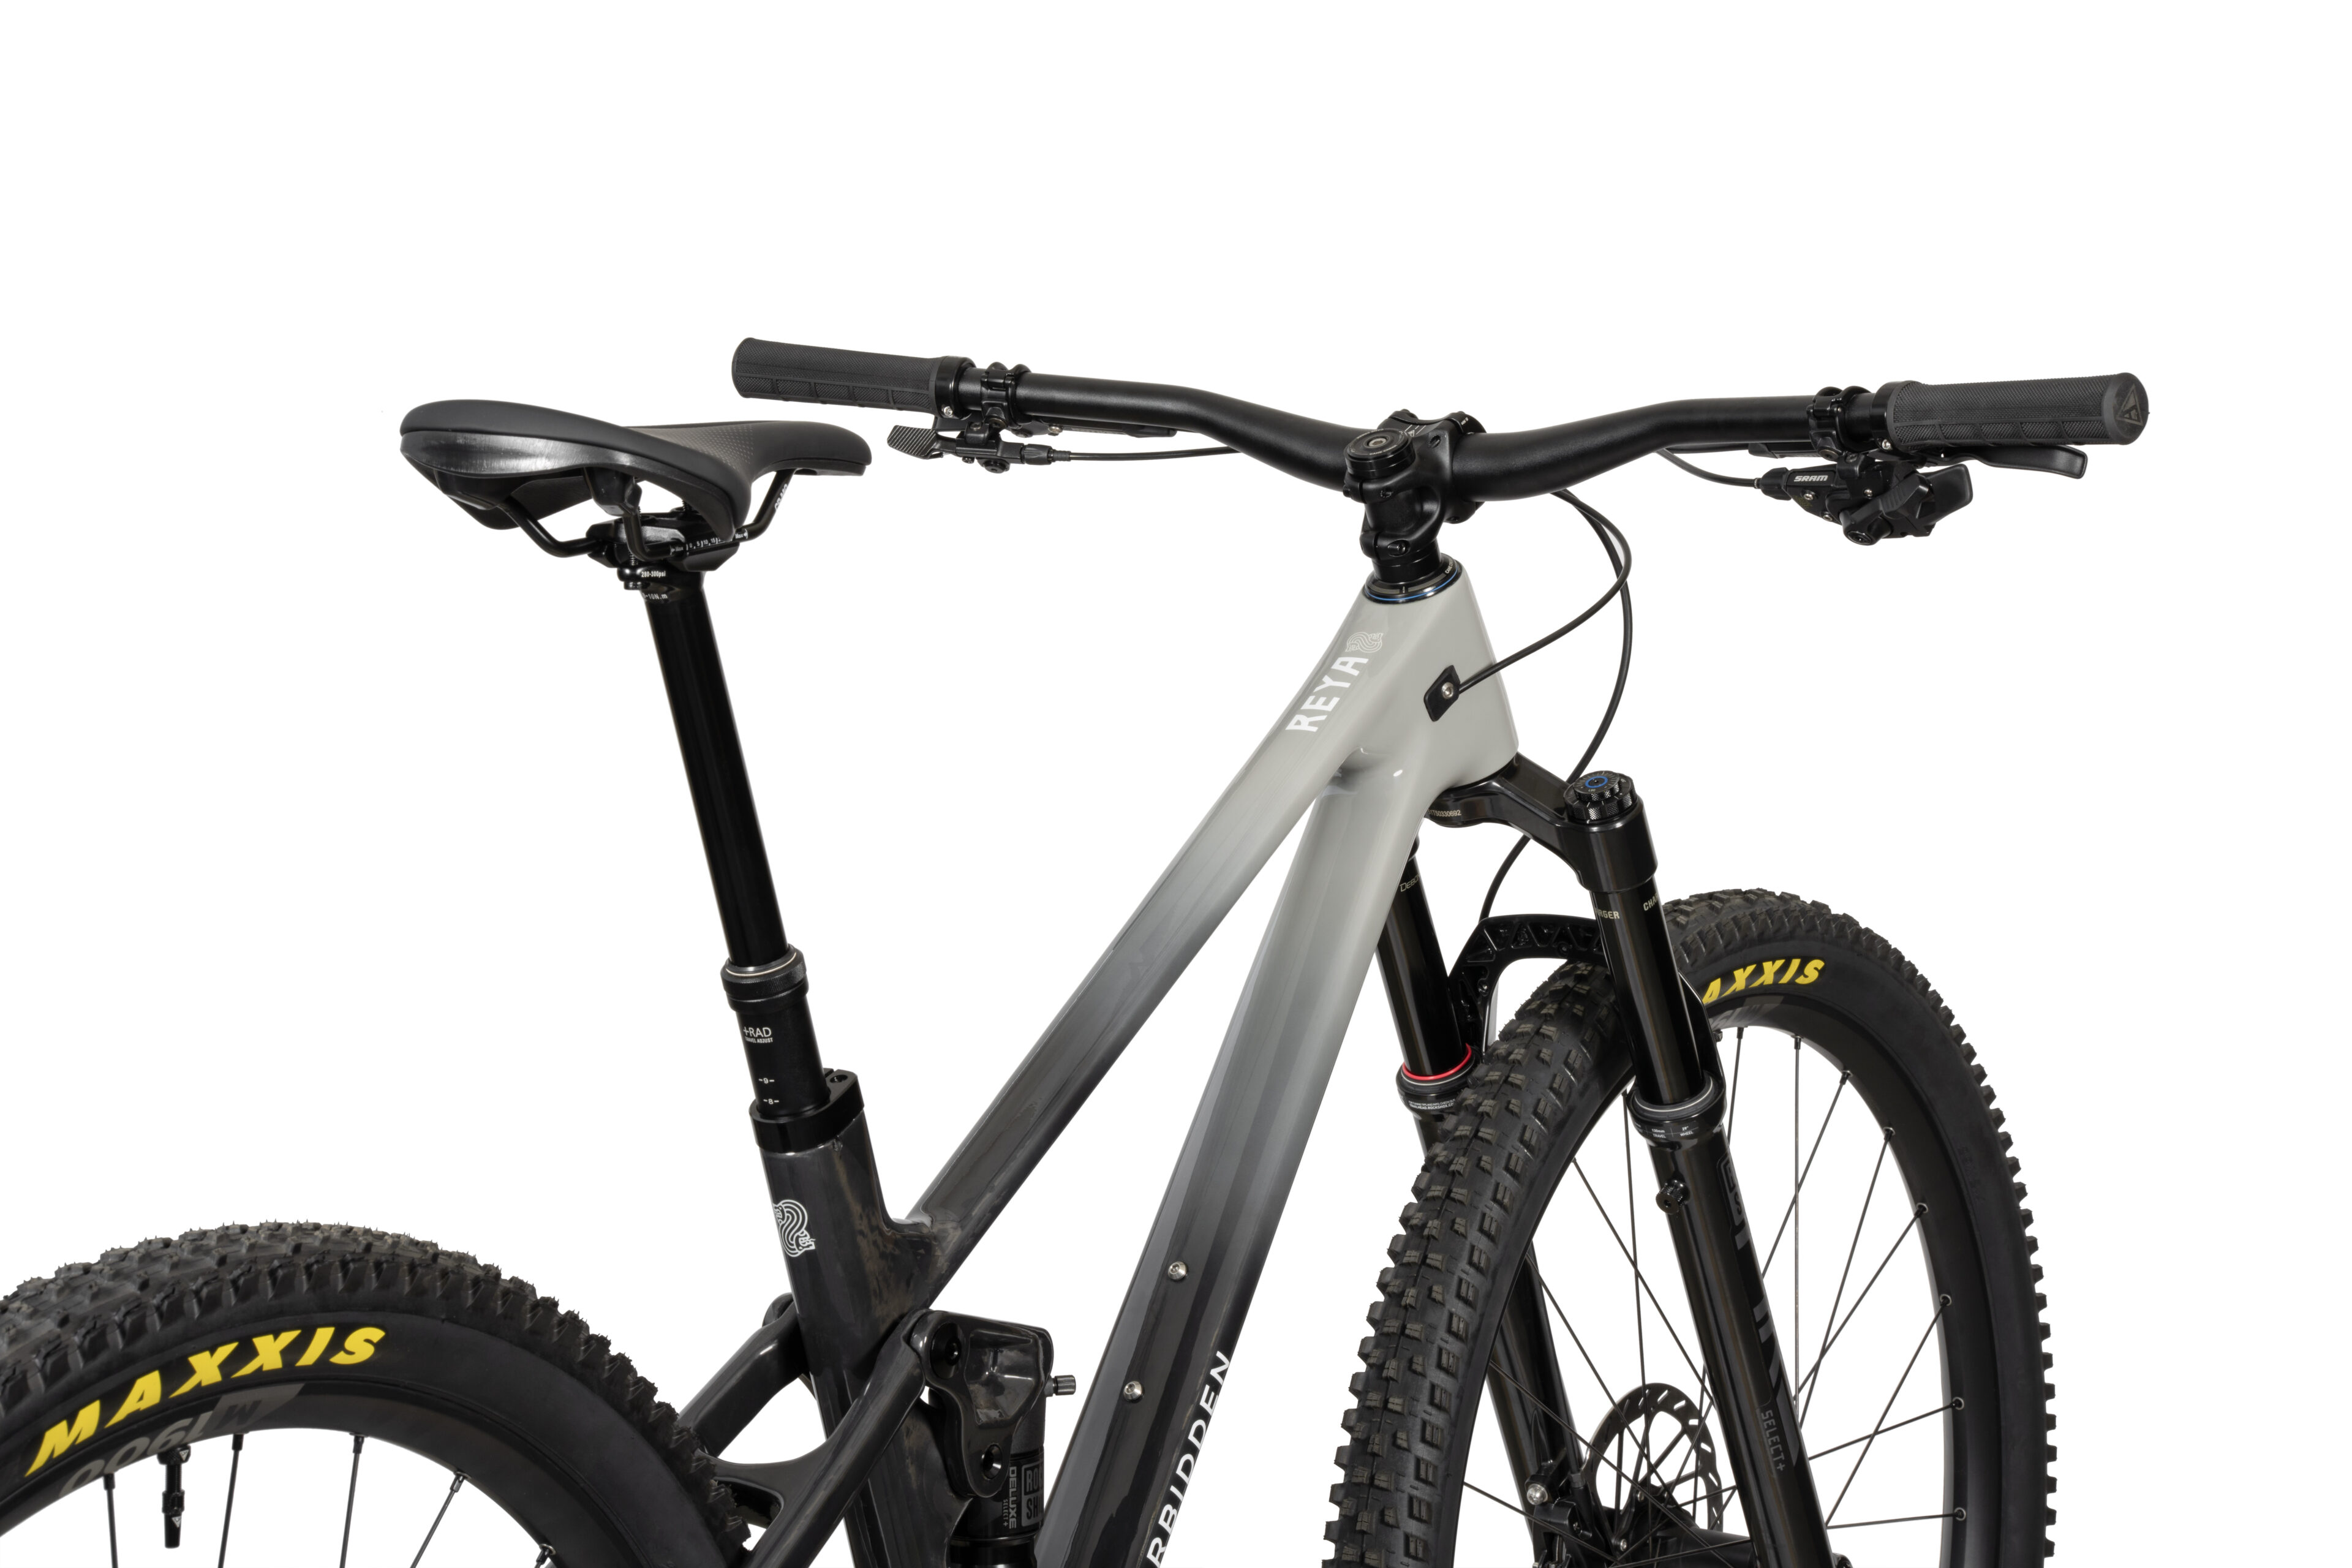
Reya utilizes our tried-and-tested hardware, all designed in-house and all bolt-checkable with a single multi-tool. We employ a full complement of oversized bearing to improve sensitivity and extended service intervals. No flex stays, no compromised kinematics. This is a proper linkage-driven bike.
Reya utilizes our tried-and-tested hardware, all designed in-house and all bolt-checkable with a single multi-tool. We employ a full complement of oversized bearing to improve sensitivity and extended service intervals. No flex stays, no compromised kinematics. This is a proper linkage-driven bike.

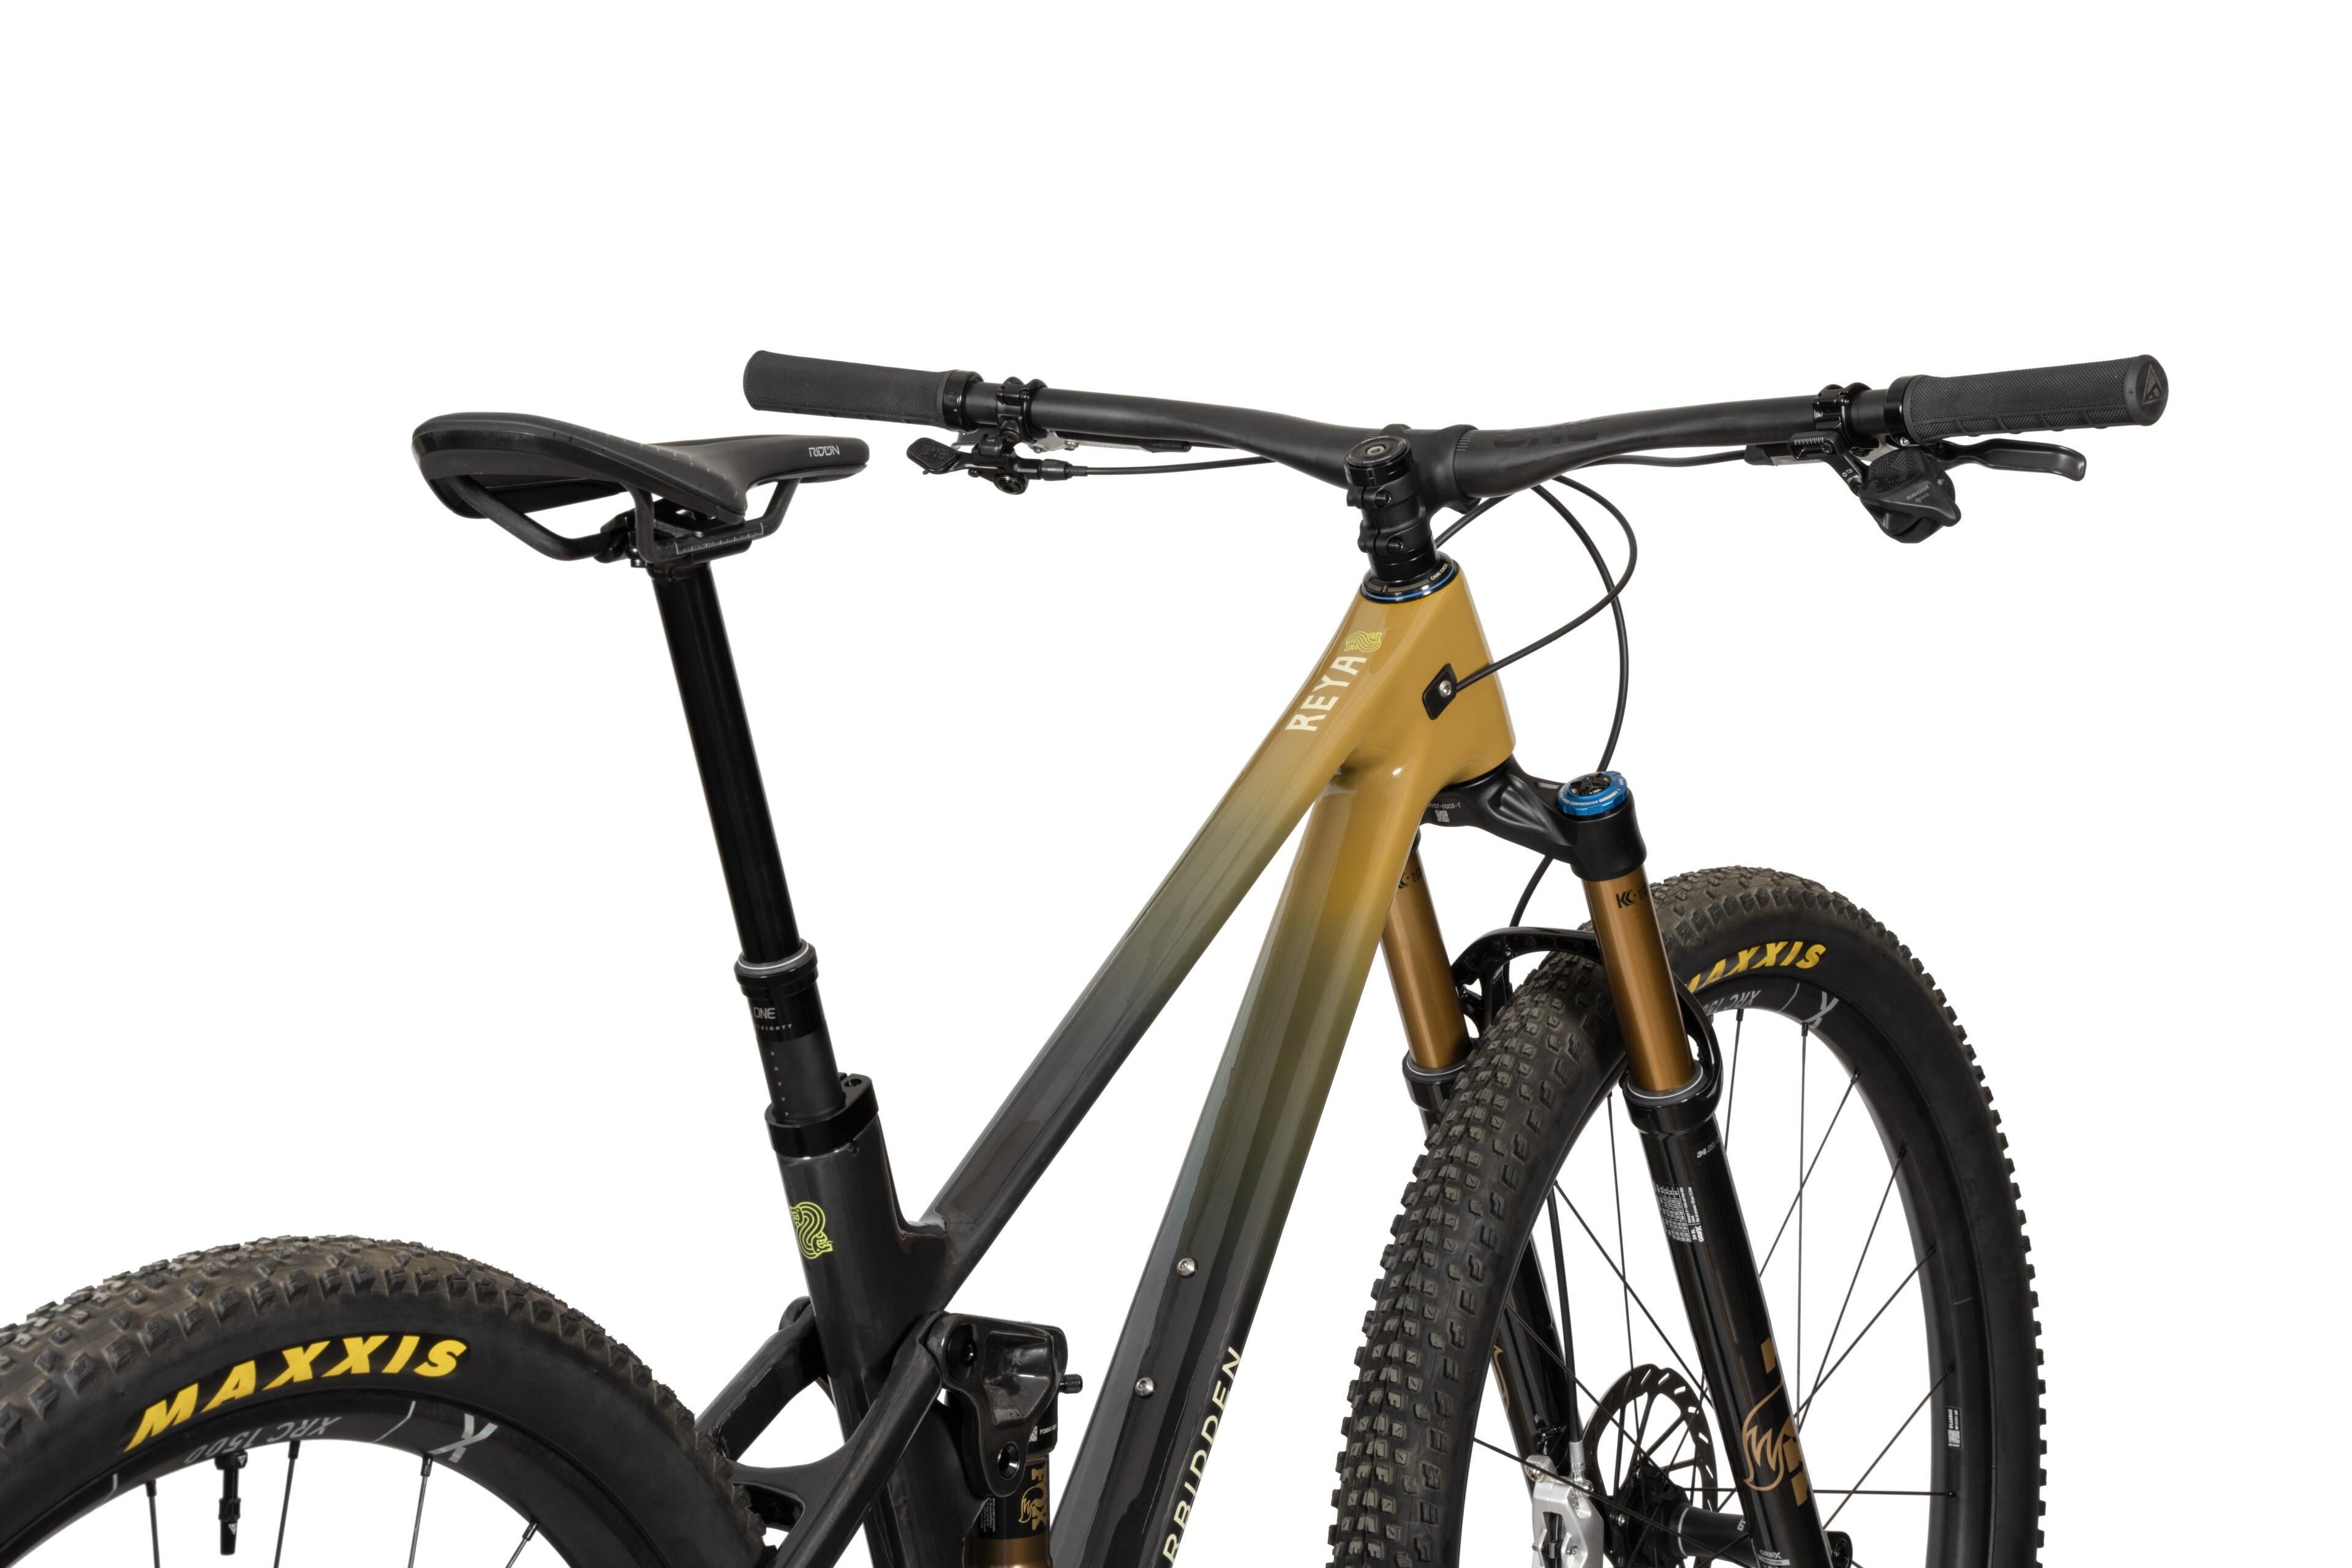
Like all our bikes, there is room for a full-size bottle on all sizes. And yes, only one bottle. We prioritized shock mount locations over 2 bottle cages. The shock is mounted off the bottom bracket area, which gives us a stiffer base and reduces torsional loads compared to top tube-mounted shocks.
Like all our bikes, there is room for a full-size bottle on all sizes. And yes, only one bottle. We prioritized shock mount locations over 2 bottle cages. The shock is mounted off the bottom bracket area, which gives us a stiffer base and reduces torsional loads compared to top tube-mounted shocks.

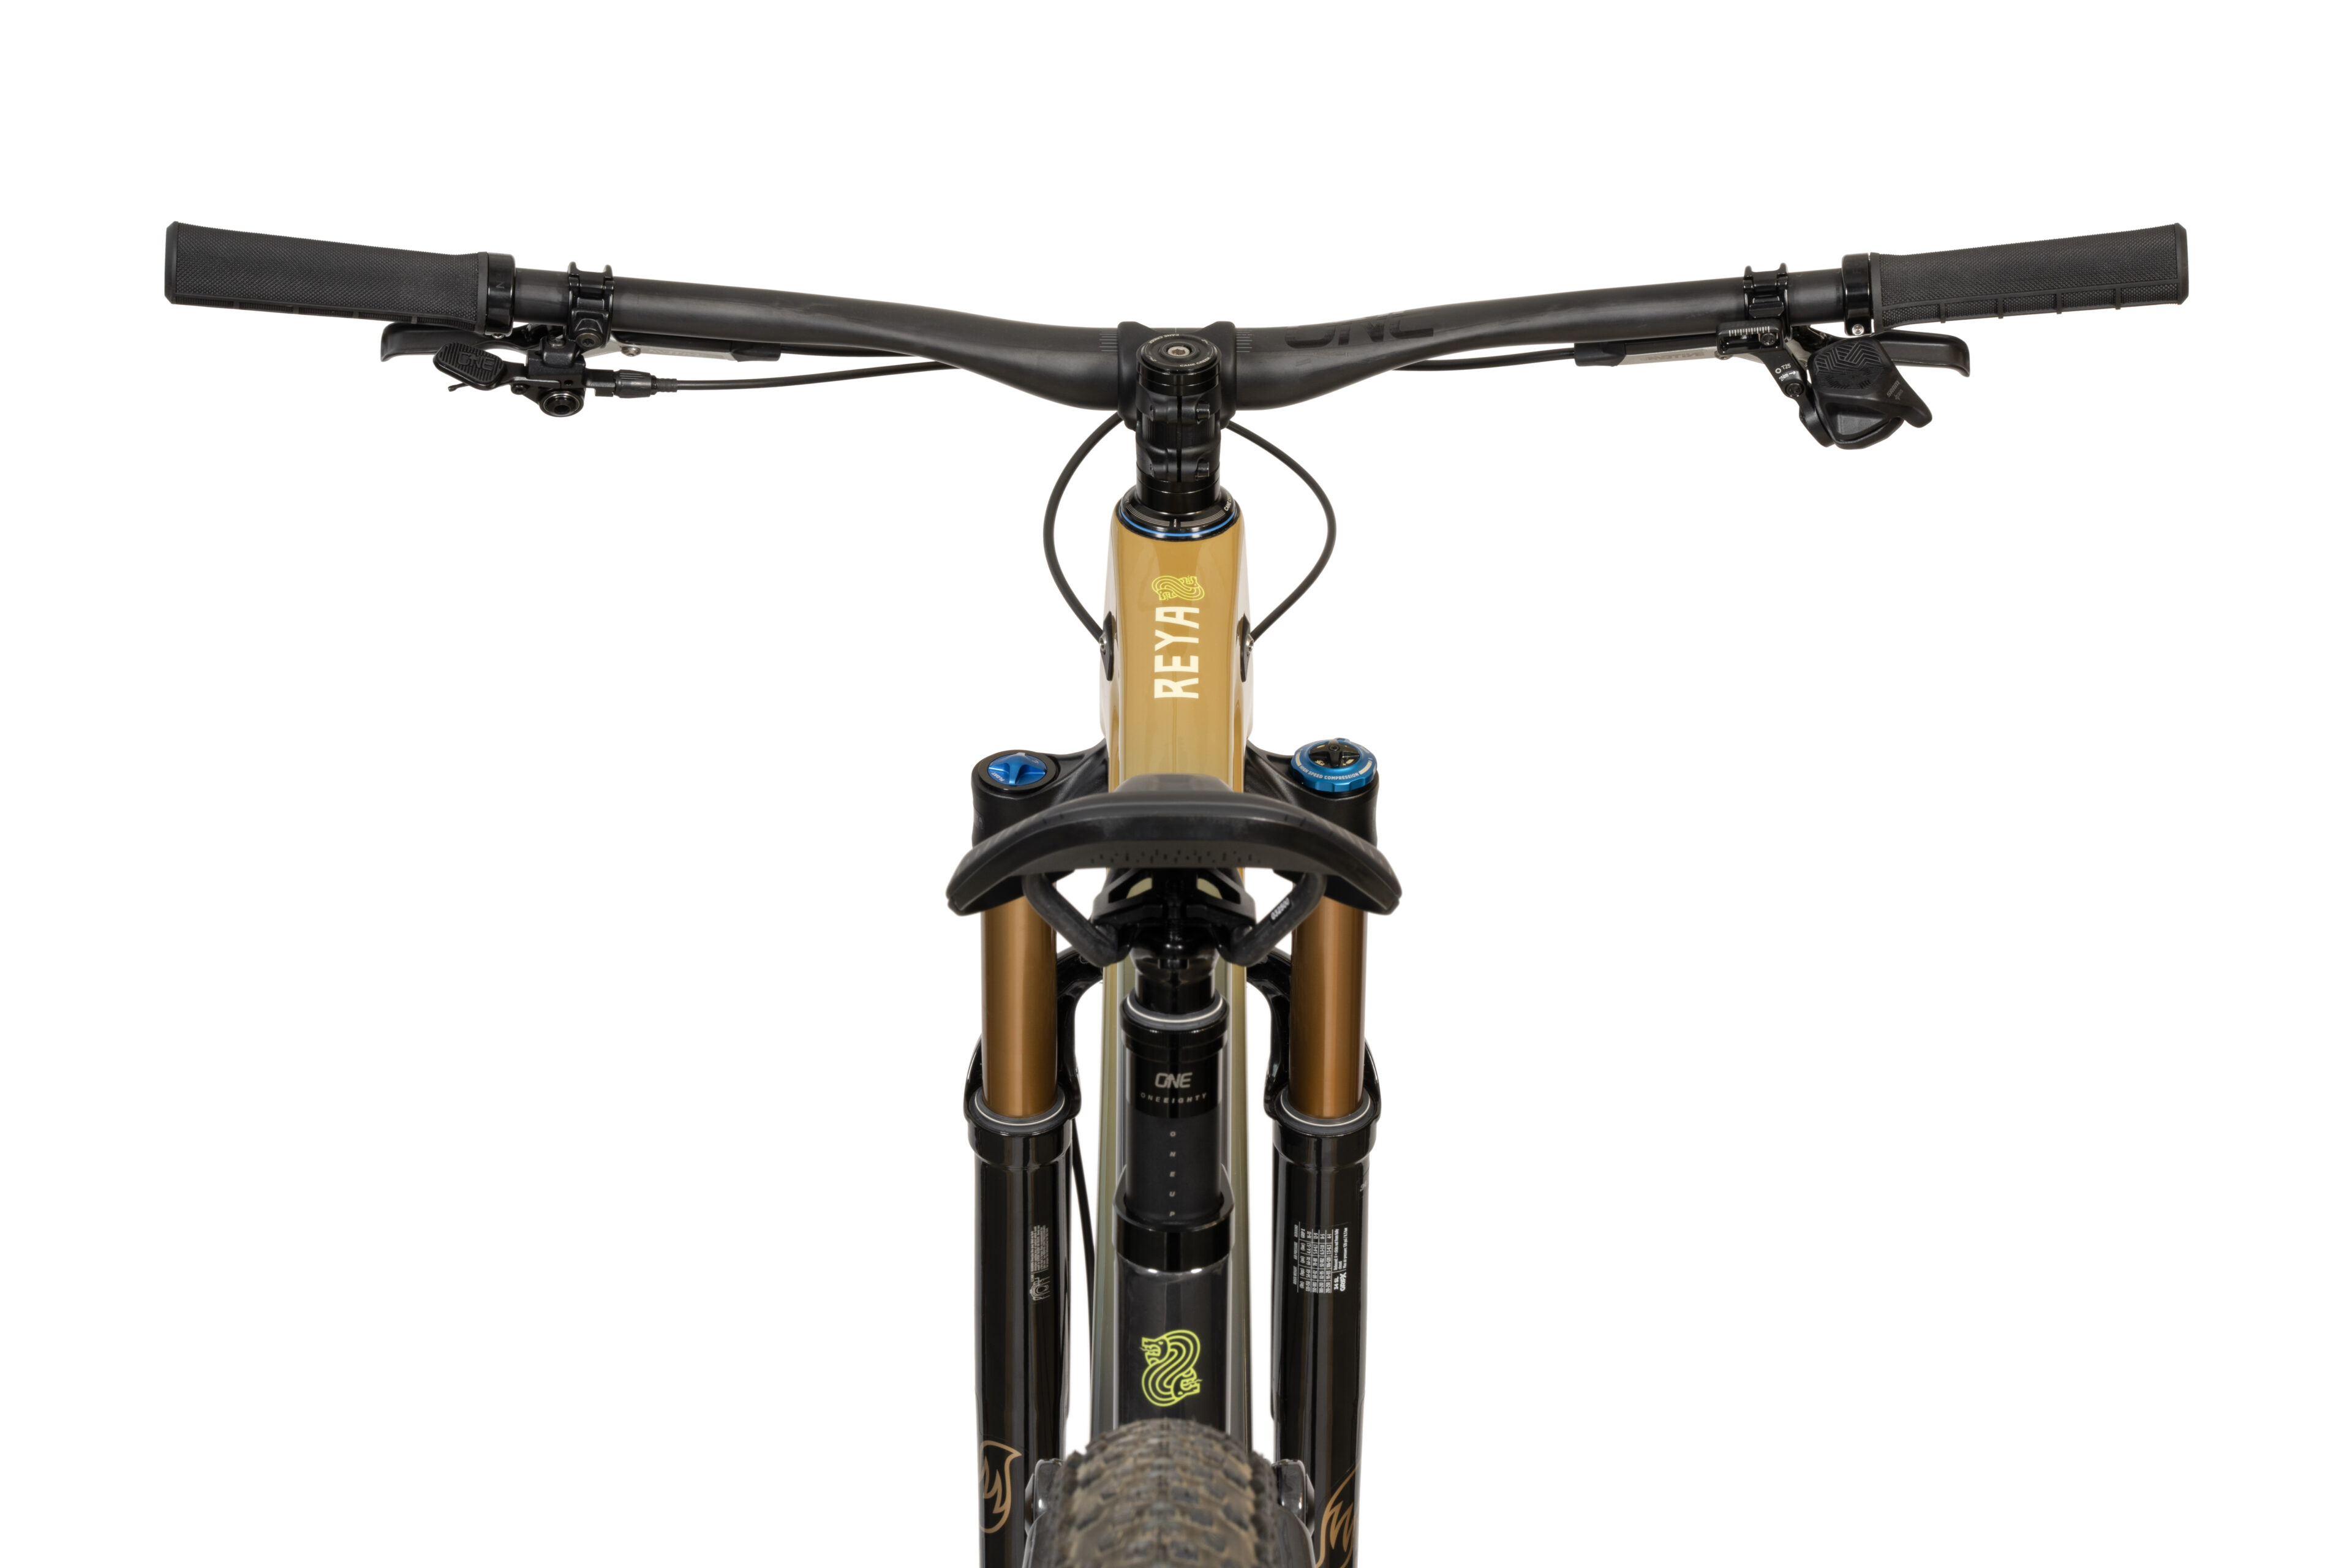
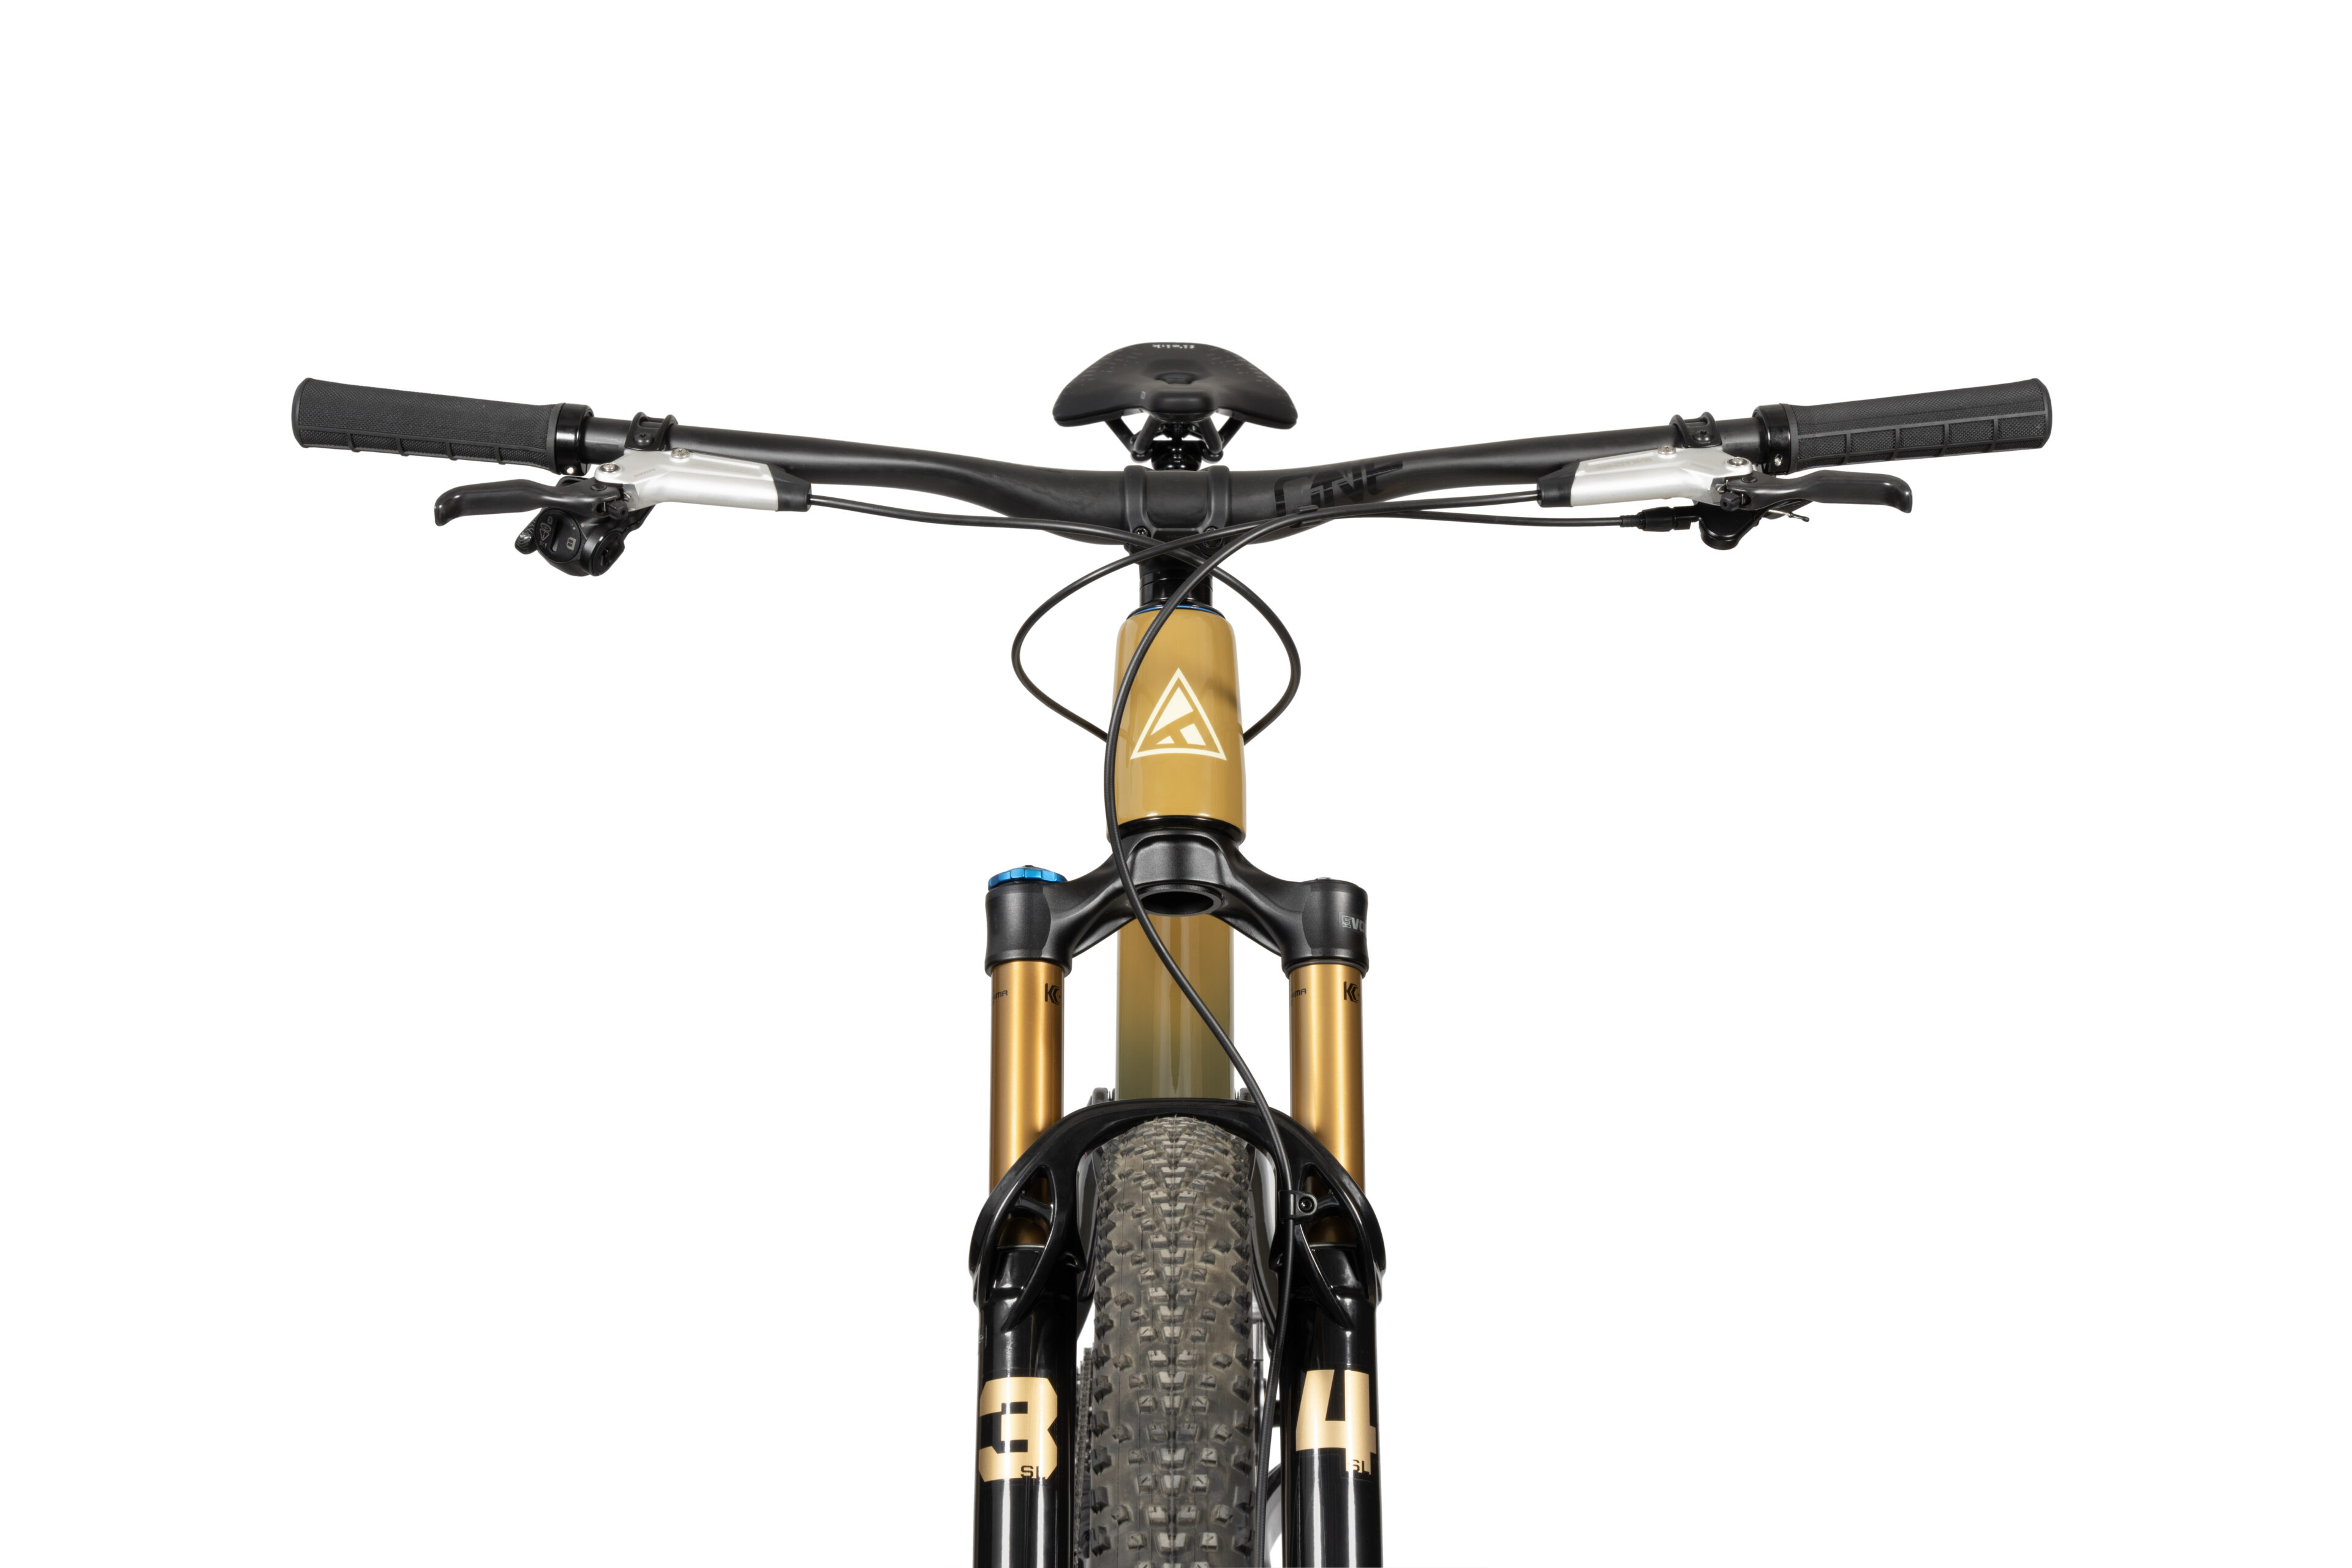
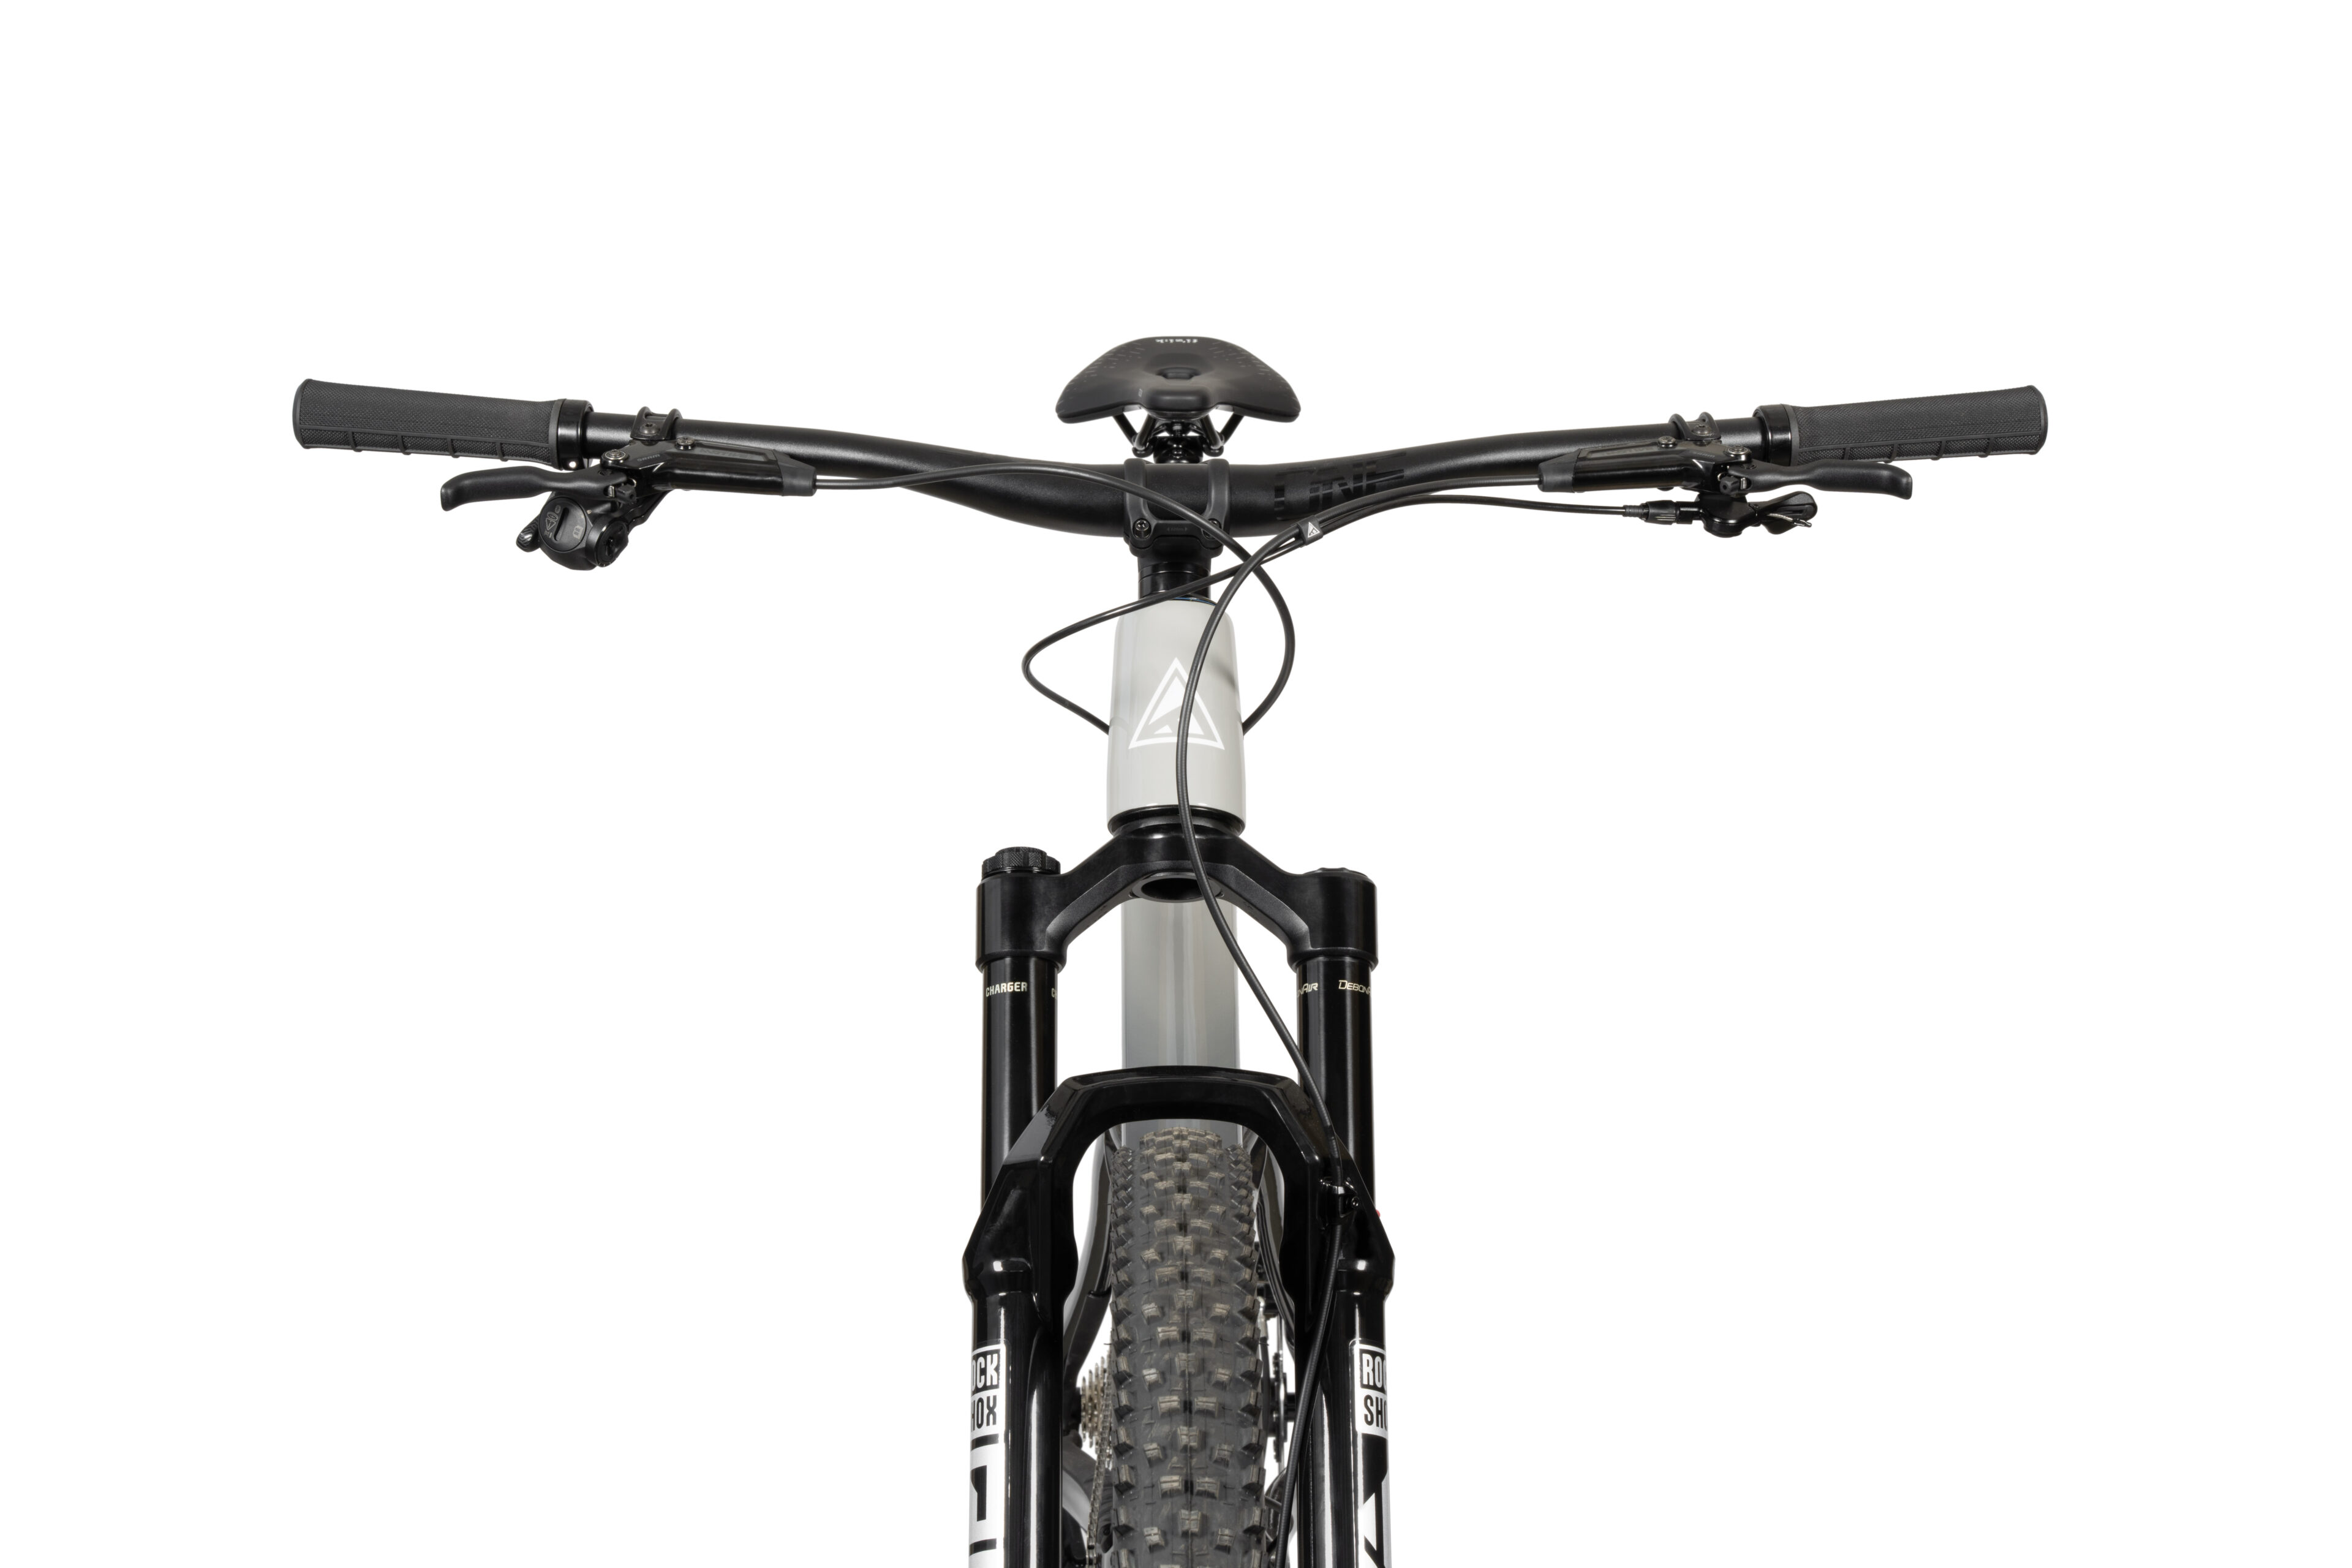
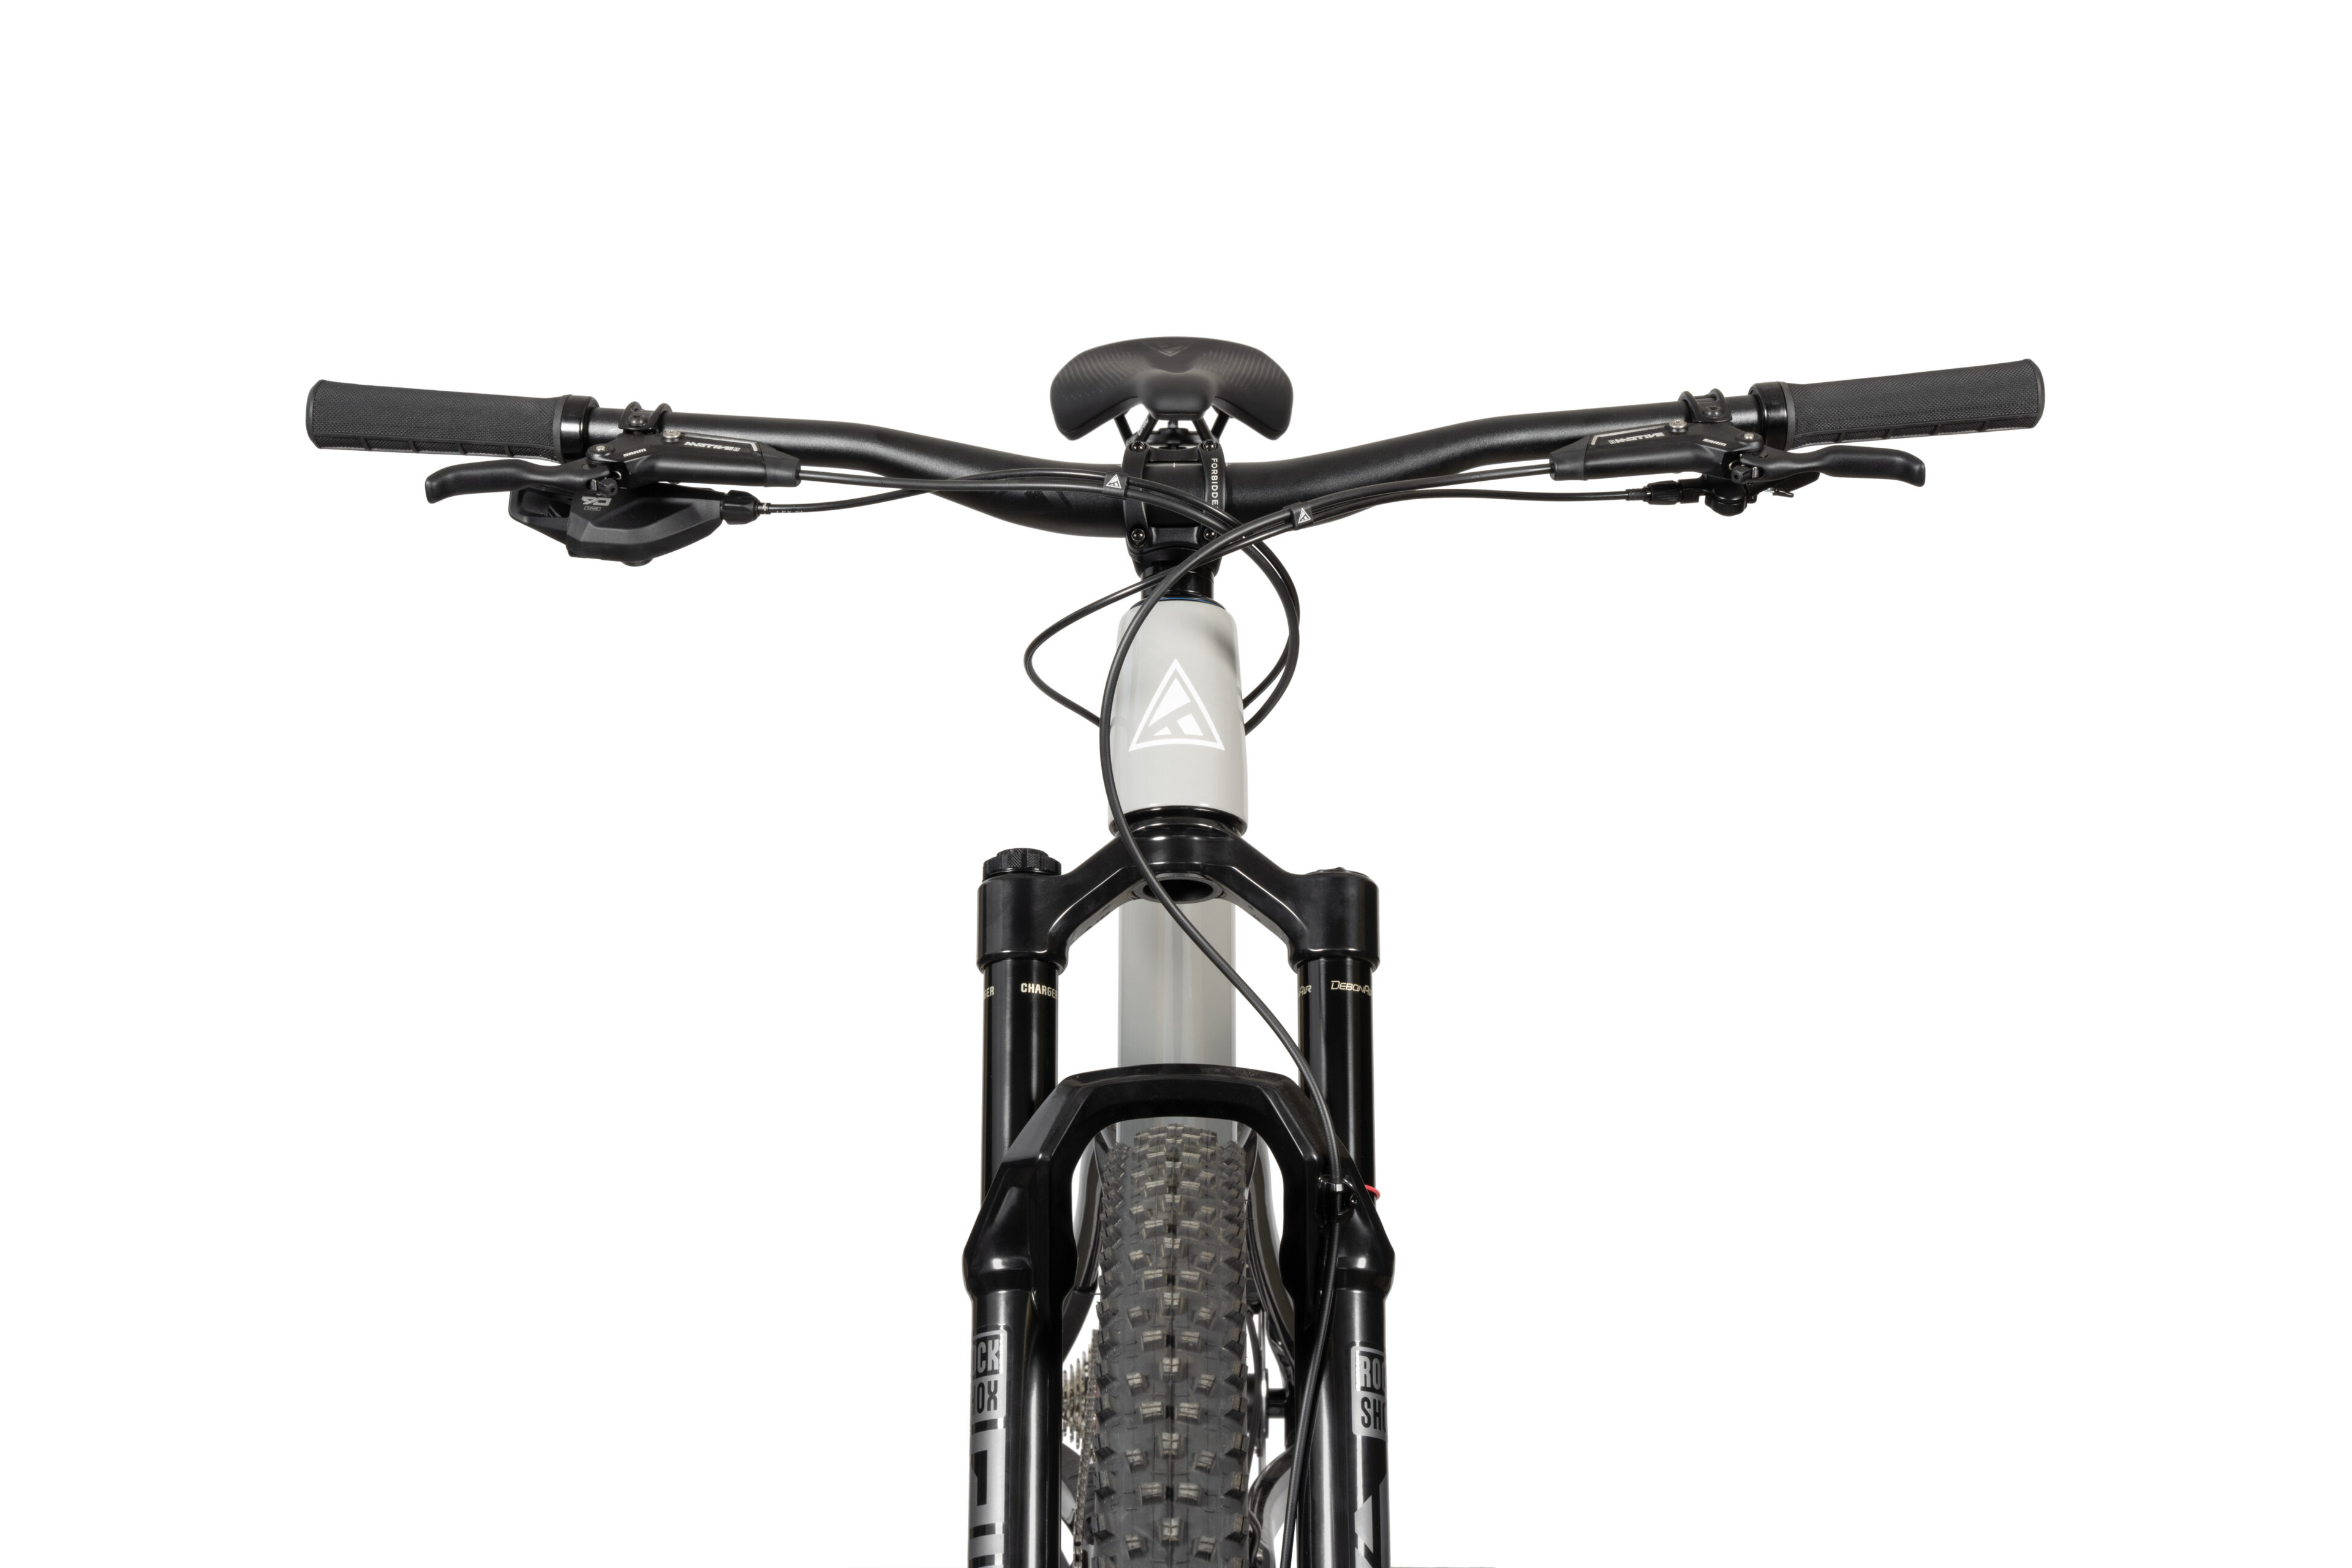
Reya features our versatile cable management system. This allows you to run your brakes whichever way you want while keeping all your cables and hoses orderly without worry. There is even the option to run a cable-actuated shock lockout. If you are into that type of thing.
Reya features our versatile cable management system. This allows you to run your brakes whichever way you want while keeping all your cables and hoses orderly without worry. There is even the option to run a cable-actuated shock lockout. If you are into that type of thing.

A quiet bike is a fast bike and a clean bike is less prone to problems. So we developed a full suite of customized rubberized frame protection to minimize noise and general wear and tear.
A quiet bike is a fast bike and a clean bike is less prone to problems. So we developed a full suite of customized rubberized frame protection to minimize noise and general wear and tear.

The ‘under the top tube’ mounting screws allow for the attachment of various accessory mounting solutions; pump, tools, a banana, the kitchen sink, go crazy, just don’t hang a water bottle there.
The ‘under the top tube’ mounting screws allow for the attachment of various accessory mounting solutions; pump, tools, a banana, the kitchen sink, go crazy, just don’t hang a water bottle there.

Threaded BB, Boost rear wheel spacing, press in headset cups – we only use what makes sense from a design and durability standpoint. You won’t find any questionable trends here – looking at you headset cable routing.
Threaded BB, Boost rear wheel spacing, press in headset cups – we only use what makes sense from a design and durability standpoint. You won’t find any questionable trends here – looking at you headset cable routing.


