
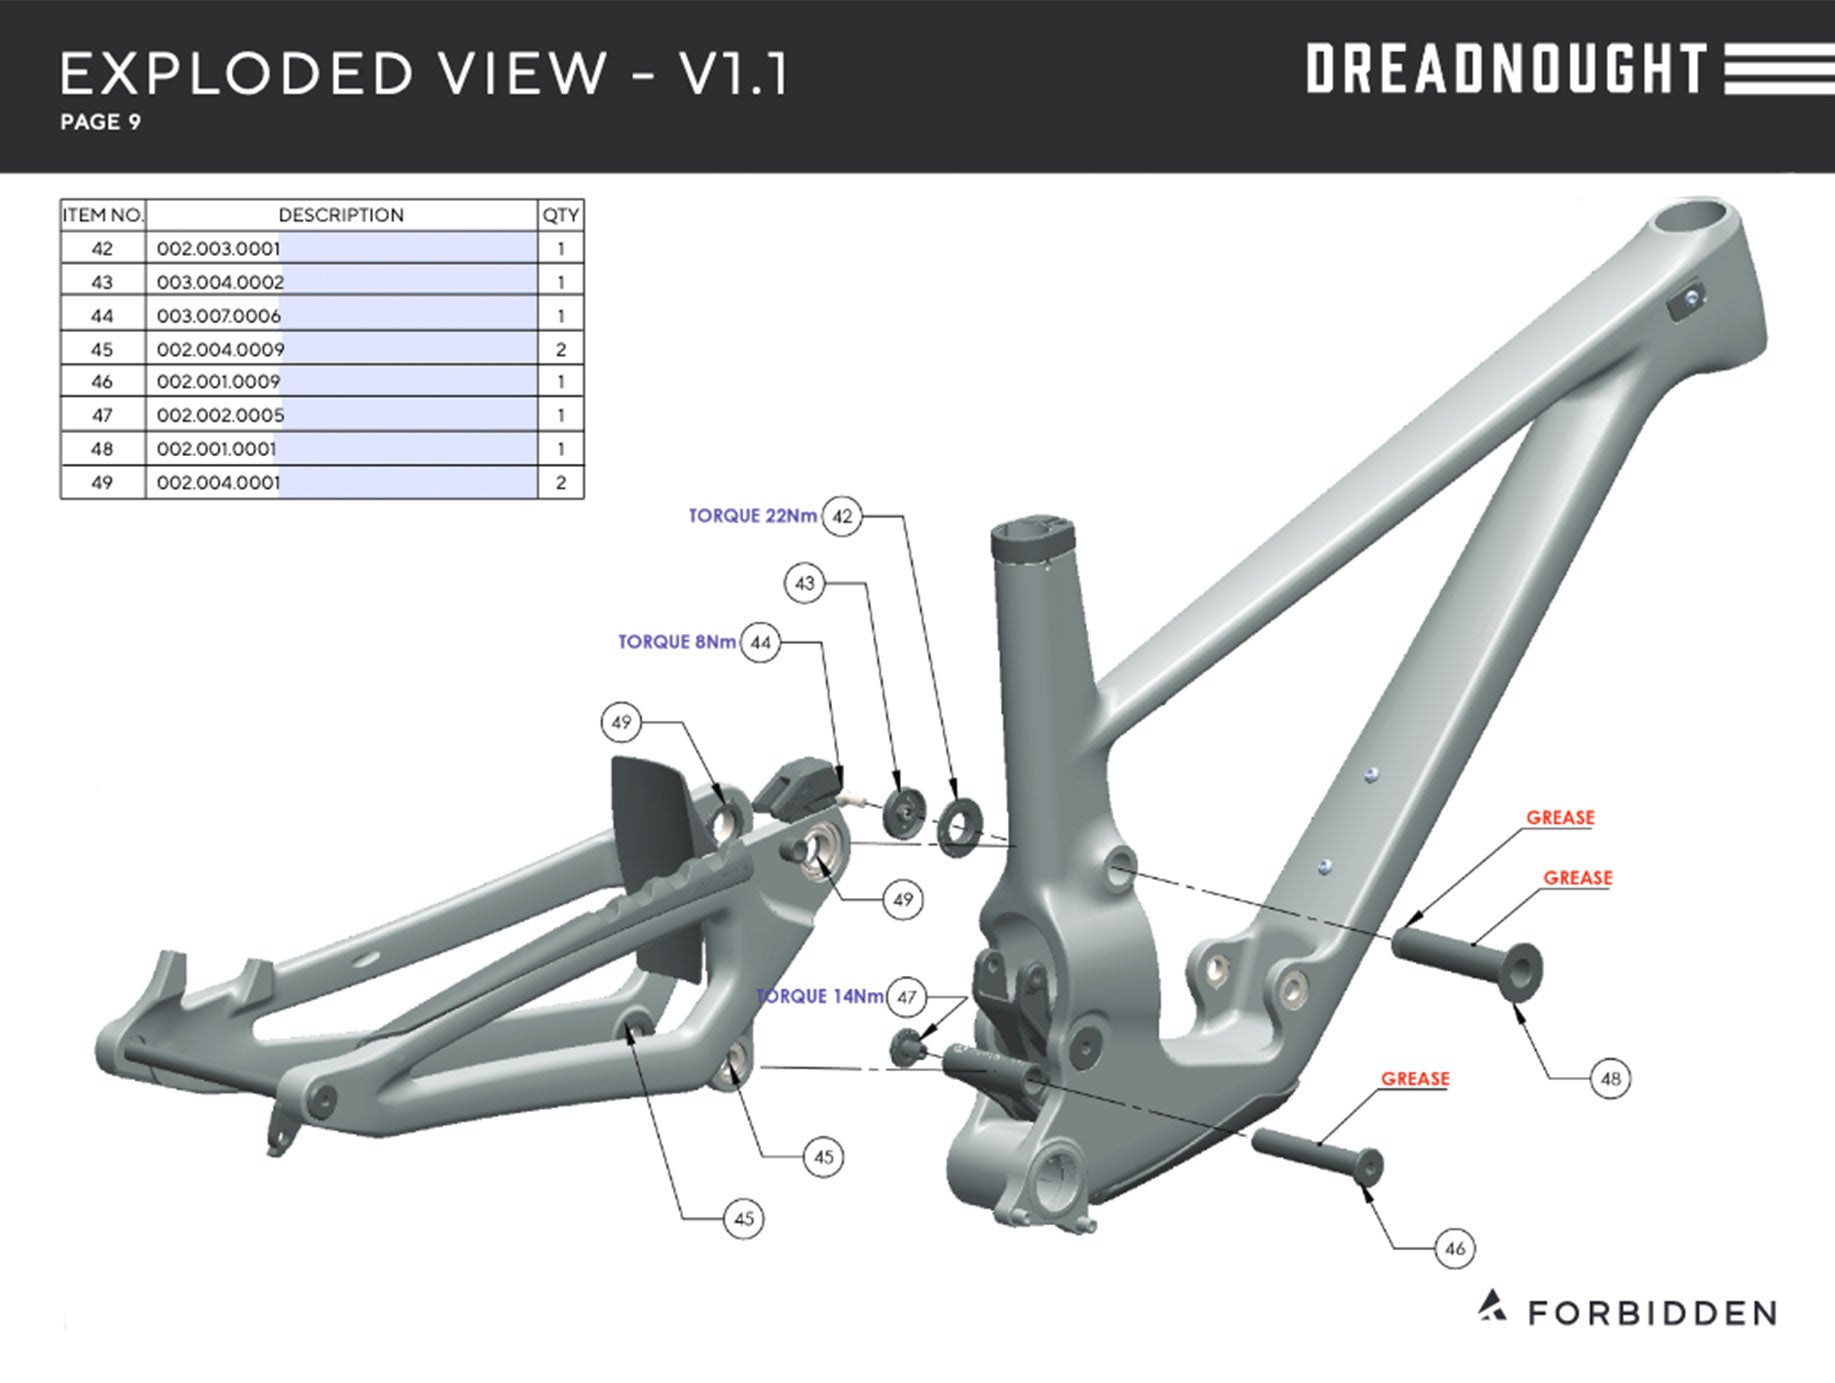
Step 1
Ensure the idler has been removed. Using a 5mm Allen key, remove the locking cover.

Step 2
Put the 24mm wrench on the nut and insert the 10mm Allen key into the shaft. Holding the wrench in place, you can loosen the shaft by spinning the Allen key clockwise.

Step 3
Once you have completed your maintenance and inspection of the main pivot, you can hand thread the nut back onto the shaft. Once again, using the 24mm wrench to hold the nut in place, rotate the 10mm Allen key counter-clockwise to snug up the shaft.
Step 4
Using your torque wrench, tighten the shaft to 22Nm. Cycle the rear end of the bike to ensure you linkage feels smooth.

Step 5
Note the inside of the locking cover to see the keyed center and the teeth on the outer ring. When the center is fitted into the shaft, the teeth will slot over the nut and prevent the two from loosening.

Step 6
In order for the locking cover to sit flush against the nut, you may have to clock it a few times to get the right combination of the teeth and the nut orientation.

Step 7
Re-install the 5mm Allen key to hold the locking cover in place and torque to 8Nm.

