Jump To:
Jump To:
THE FOX FLOAT X2 PERFORMANCE ELITE SHOCK
STEP 1 (PERFORMANCE ELITE ONLY)
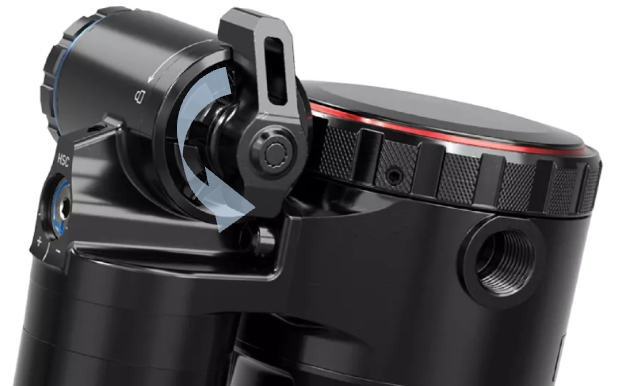
Turn the 2-position Compression lever to the fully OPEN mode (counter-clockwise).

STEP 2
To set the sag, push the shock o-ring all the way to the shock body and carefully sit on the bike wearing your riding kit and measure how far it has moved. For the Dreadnought, we recommend 35% sag (or 22.75mm of shaft insertion). Please reference the chart below for your recommended [air pressure] start- ing point in PSI.
As you fine tune the way your Dreadnought feels on the trail, we’d recommend making small and incremental adjustments of 2 PSI. Please use the compact digital shock pump (this was designed to fit into most back and hip packs) that came with your bike to make these adjustments on the trail.
STEP 3
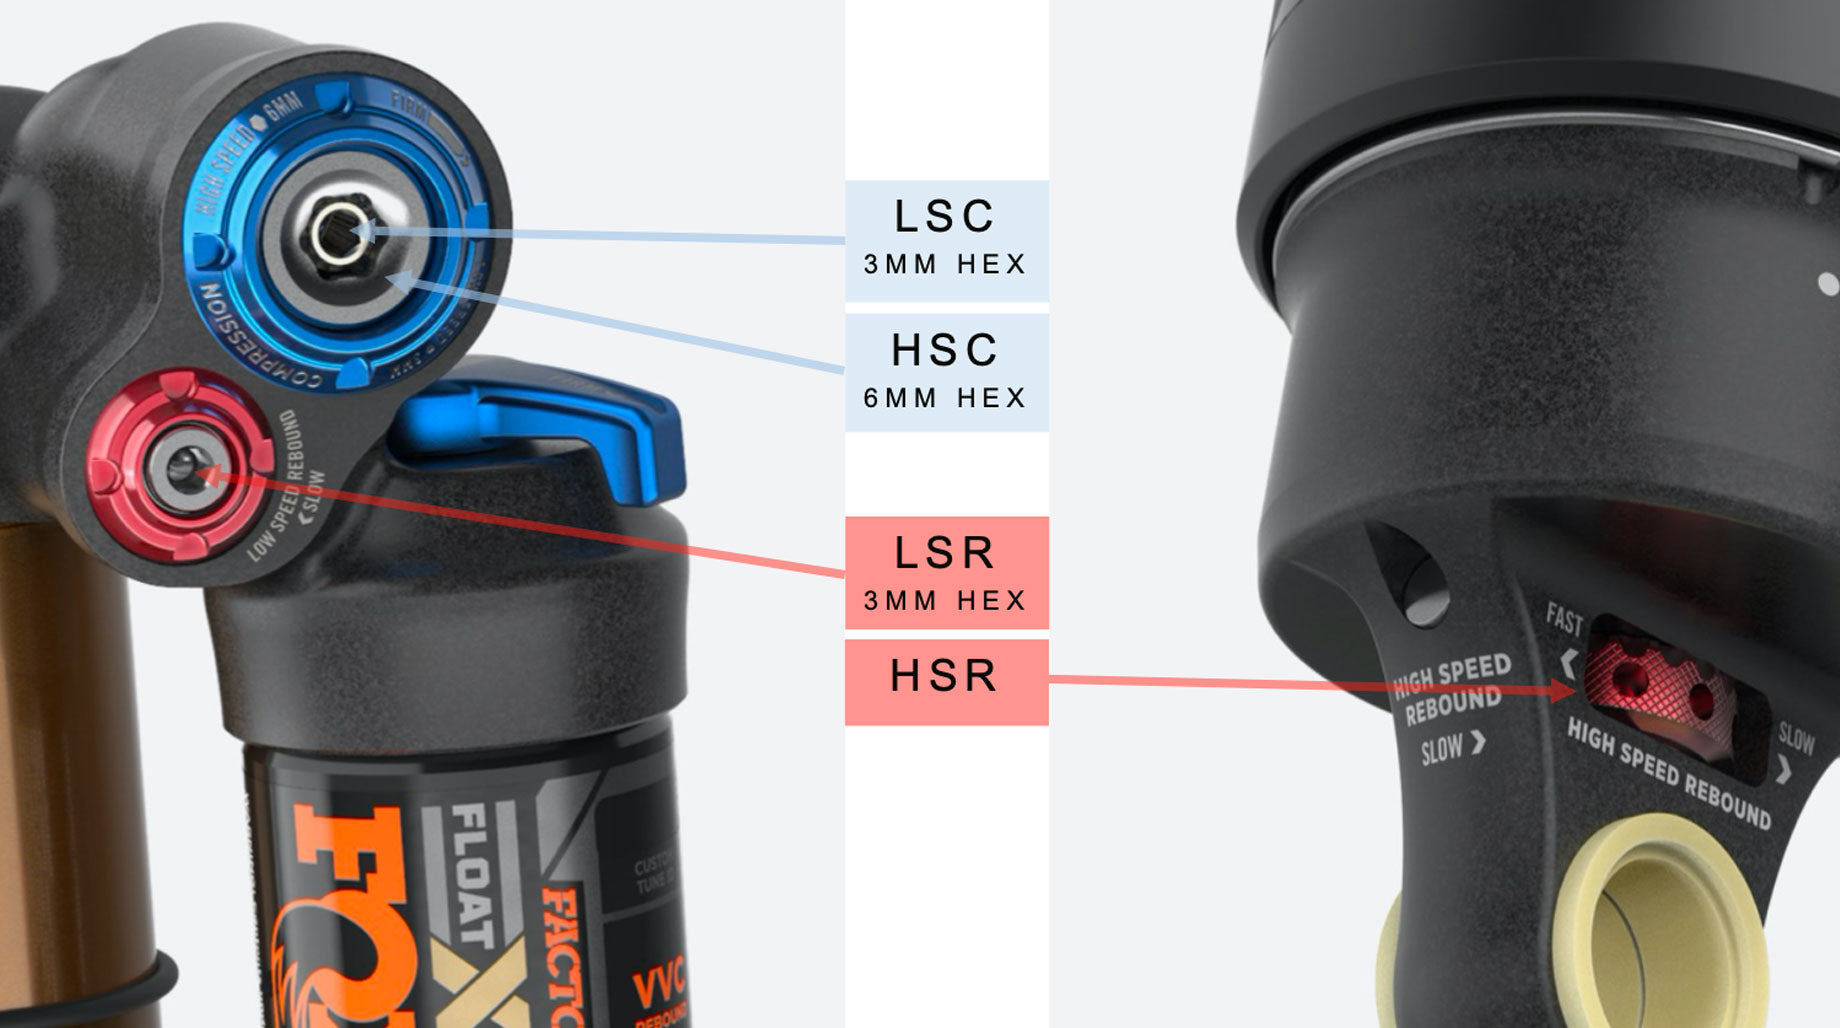
Turn the [red] Rebound adjusters (HSR on Performance Elite shocks only) and the [blue] Compression adjusters (HSC on Performance Elite shocks only) all the way to the closed (full clockwise) position.

The recommended settings as shown below are clicks counted from closed—use this chart to determine your baseline settings.
| Rider Weight (lbs) | Shock Air Pressure (psi) | Low Speed Rebound (LSR) | High Speed Rebound (HSR)* | Low Speed Compression (LSC) | High Speed Compression (HSC)* |
| 120-130 | 90 | 17 – 18 | 7 – 8 | 17 – 18 | 9 – 10 |
| 130-140 | 100 | 17 – 18 | 7 – 8 | 16 – 18 | 8 – 9 |
| 140-150 | 110 | 16 – 18 | 7 – 8 | 15 – 17 | 7 – 9 |
| 150-160 | 120 | 15 – 17 | 5 – 6 | 14 – 16 | 7 – 8 |
| 160-170 | 130 | 14 – 16 | 4 – 5 | 13 – 15 | 7 – 8 |
| 170-180 | 140 | 13 – 15 | 4 – 5 | 12 – 14 | 6 – 7 |
| 180-190 | 150 | 12 – 14 | 3 – 4 | 11 – 13 | 6 – 7 |
| 190-200 | 160 | 11 – 13 | 3 – 4 | 10 – 12 | 5 – 7 |
| 200-210 | 170 | 10 – 12 | 2 – 3 | 9 – 11 | 5 – 6 |
| 210-220 | 180 | 9 – 11 | 2 – 3 | 8 – 10 | 5 – 6 |
| 220-230 | 190 | 7 – 9 | 1 – 2 | 8 – 10 | 4 – 6 |
| 230-240 | 200 | 6 – 8 | 1 – 2 | 7 – 9 | 4 – 5 |
| 240-250 | 210 | 6 – 8 | 1 – 2 | 6 – 8 | 4 – 5 |
* Performance Elite shocks only
– Tune: CL001 JCR010
– The Float X2 comes with no volume reducer in the air canister, maximum allowable is 2 for this size shock.
– For more information on the Fox Float X2 shock.
Back to top
THE EXT STORIA LOK V3—ENDURO RACING SHOCK
STEP 1
Turn the [Lok] lock-out lever to the fully OPEN position (counter-clockwise).

STEP 2
For the Dreadnought, we recommend 35% sag (or 22.75mm of shaft insertion). Please reference the chart below for your recommended spring weight. These spring weights will provide approximately 35%.
| Rider Weight (lbs) | Spring Weight (lbs) |
| 132 – 143 | 300 |
| 143 – 154 | 325 |
| 154 – 165 | 350 |
| 165 – 176 | 375 |
| 176 – 187 | 400 |
| 187 – 198 | 425 |
| 198 – 209 | 450 |
| 209 – 220 | 475 |
| 220 – 231 | 500 |
STEP 3
Turn the Rebound adjuster and the Compression adjusters all the way to the closed (full clockwise) position.

The recommended settings as shown below are clicks counted from closed—use this chart to determine your baseline settings.
| Rider Weight (lbs) | Spring Weight (lbs) | Low Speed Rebound (LSR) | Low Speed Compression (LSC) | High Speed Compression (HSC) |
| 132 – 143 | 300 | 11 | 12 – 13 | 14 – 16 |
| 143 – 154 | 325 | 10 | 11 – 12 | 13 – 15 |
| 154 – 165 | 350 | 9 | 9 – 10 | 11 – 13 |
| 165 – 176 | 375 | 8 | 8 – 9 | 10 – 12 |
| 176 – 187 | 400 | 7 | 7 – 9 | 9 – 11 |
| 187 – 198 | 425 | 6 | 7 – 8 | 8 – 10 |
| 198 – 209 | 450 | 5 | 6 – 7 | 8 – 9 |
| 209 – 220 | 475 | 3 | 4 – 5 | 7 – 9 |
| 220 – 231 | 500 | 2 | 3 – 4 | 6 – 8 |
– For more information on the EXT Storia shock.
Back to top
THE ROCKSHOX SUPER DELUXE ULTIMATE SHOCK
STEP 1
Turn the lock-out lever to the fully OPEN mode (pointing towards the shock body).

STEP 2
To set the sag, push the shock o-ring all the way to the shock body and carefully sit on the bike wearing your riding kit and measure how far it has moved. For the Dreadnought, we recommend 35% sag (or 22.75mm of shaft insertion). Please reference the chart below for your recommended [air pressure] start- ing point in PSI.
As you fine tune the way your Dreadnought feels on the trail, we’d recommend making small and incremental adjustments of 2 PSI. Please use the compact digital shock pump (this was designed to fit into most back and hip packs) that came with your bike to make these adjustments on the trail.

STEP 3
Turn the [red] Rebound adjuster and the [black] Compression (LSC) adjuster all the way to the closed (full clockwise) position. Note that the rebound adjuster can get stiffer as you close it. For reference there should be 10 clicks from open.

The recommended settings as shown below are clicks counted from closed—use this chart to determine your baseline settings. You will notice that this shock is run with open/fast for the majority of rider weights.
| Rider Weight (lbs) | Shock Air Pressure (psi) | Low Speed Compression (LSC) | Rebound (LSR) |
| 120-130 | 80 | 10 | 10 |
| 130-140 | 90 | 10 | 10 |
| 140-150 | 100 | 10 | 10 |
| 150-160 | 110 | 9 | 10 |
| 160-170 | 120 | 9 | 9 |
| 170-180 | 130 | 8 | 9 |
| 180-190 | 140 | 8 | 9 |
| 190-200 | 150 | 7 | 8 |
| 200-210 | 160 | 7 | 8 |
| 210-220 | 170 | 7 | 8 |
| 220-230 | 180 | 6 | 7 |
| 230-240 | 190 | 6 | 7 |
| 240-250 | 200 | 6 | 6 |
– Tune: LLC
– The Super Deluxe comes with 1 volume reducer in the air canister.
– For more information on the Super Deluxe Ultimate .
Back to top
THE OHLINS TTX2AIR SHOCK
STEP 1
Turn the HSC lever to the fully OPEN position [counter-clockwise].

STEP 2
To set the sag, push the shock o-ring all the way to the shock body and carefully sit on the bike wearing your riding kit and measure how far it has moved. For the Dreadnought, we recommend 35% sag (or 22.75mm of shaft insertion). Please reference the chart below for your recommended [air pressure] start- ing point in PSI.
As you fine tune the way your Dreadnought feels on the trail, we’d recommend making small and incremental adjustments of 2 PSI. Please use the compact digital shock pump (this was designed to fit into most back and hip packs) that came with your bike to make these adjustments on the trail.
STEP 3
Using a 3mm hex turn the [gold] Rebound adjuster and the [blue] Compression (LSC) adjuster all the way to the closed (full clockwise) position.

The recommended settings as shown below are clicks counted from closed—use this chart to determine your baseline settings.
| Rider Weight (lbs) | Shock Air Pressure (psi) | High Speed Compression (HSC) | Low Speed Compression (LSC) | Rebound (LSR) | Tune* |
| 120 – 130 | 105 | OPEN | 10 | 11 | C20 R10 |
| 130 – 140 | 115 | OPEN | 9 | 10 | C20 R10 |
| 140 – 150 | 125 | OPEN | 8 | 9 | C20 R10 |
| 150 – 160 | 135 | OPEN | 8 | 9 | C20 R10 |
| 160 – 170 | 145 | OPEN | 9 | 10 | C20 R20 |
| 170 – 180 | 155 | OPEN | 8 | 9 | C20 R20 |
| 180 – 190 | 165 | OPEN | 8 | 8 | C20 R20 |
| 190 – 200 | 175 | OPEN | 8 | 7 | C20 R20 |
| 200 – 210 | 185 | OPEN | 7 | 6 | C20 R20 |
| 210 – 220 | 195 | OPEN | 6 | 5 | C20 R20 |
| 220 – 230 | 205 | OPEN | 6 | 5 | C20 R20 |
| 230 – 240 | 215 | OPEN | 5 | 4 | C20 R20 |
| 240 – 250 | 225 | OPEN | 5 | 4 | C20 R20 |
* Tune: We recommend the C20 R10 tune for riders under 160lbs (72.5kg). For riders over this weight we recommend the C20 R20.
– The TTX2Air comes with a 8,000mm3 volume reducer in the air canister.
– For more information on the TTX2Air.
Back to top
THE PUSH ELEVENSIX SHOCK
The PUSH ELEVENSIX has been specifically tuned to suit the kinematics and riding intent of the Dreadnought. For full details on this shock as well as useful setup guides, please follow the link to the PUSH website.
Back to top
Rockshox Super Deluxe Ultimate
Step 1
Turn the lock-out lever to the fully OPEN position (counter-clockwise).

Step 2
To set the sag, push the shock o-ring all the way to the shock body and carefully sit on the bike wearing your riding kit and measure how far it has moved. For the Dreadnought, we recommend 35% sag (or 23mm of shaft insertion). Please reference the chart below for your recommended [air pressure] starting point in PSI.
As you fine tune the way your Dreadnought feels on the trail, we’d recommend making small and incremental adjustments of 2 PSI.

Step 3

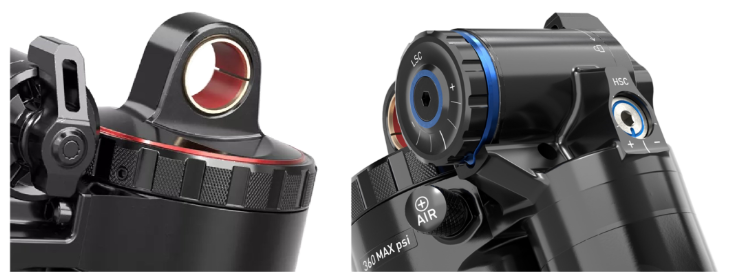
Turn the Rebound adjuster [red ring] all the way to the closed position (full clockwise). Set the compression adjusters [blue rings] to their middle positions.
The recommended settings are shown below — use this chart to determine your baseline settings.
Rider Weight (lbs) Shock Air Pressure High Speed Compression Low Speed Compression Rebound
(PSI) (HSC) [from mid-position] (LSC) [from mid-position] (LSR) [from closed]
| 120-130 | 80 | -2 | -1 | 13 |
| 130-140 | 90 | -2 | -1 | 13 |
| 140-150 | 100 | -1 | 0 | 12 |
| 150-160 | 110 | -1 | 0 | 12 |
| 160-170 | 120 | -1 | 0 | 12 |
| 170-180 | 130 | -1 | 0 | 11 |
| 180-190 | 140 | -1 | 0 | 10 |
| 190-200 | 150 | -1 | 0 | 9 |
| 200-210 | 160 | -1 | 0 | 8 |
| 210-220 | 170 | 0 | +1 | 8 |
| 220-230 | 180 | 0 | +1 | 7 |
| 230-240 | 190 | 0 | +1 | 7 |
| 240-250 | 200 | 0 | +1 | 6 |
- – Tune: LNLC 0L1
- The Super Deluxe comes with 1 volume reducer in the air canister.
- For more information on the Super Deluxe Ultimate .
- Compression adjustment is referenced from the mid-position (0). 2 clicks of adjustment are available in either direction, positive or negative from middle. A positive adjustment will provide heavier damping, a negative adjustment will provide lighter damping


